
Knowledge Base > Marketing automation > Customer journey – new contact registered – Welcome
Contacts have registered on your contact list through the signup form on your website, or perhaps they subscribed to receive updates through a pop-up on your site. It’s also possible that they joined your customer club through a landing page you shared on one of your WhatsApp or Facebook groups. This is the perfect time to welcome them for joining.
It’s recommended to send them an email, WhatsApp, or SMS right after registering. After a few days, you can send them a welcome offer for their joining, and perhaps in the future, you can send them emails with relevant usage guides, tips, or offers of assistance or service.
So, how can all of this be done automatically without sending separate messages every time someone registers?
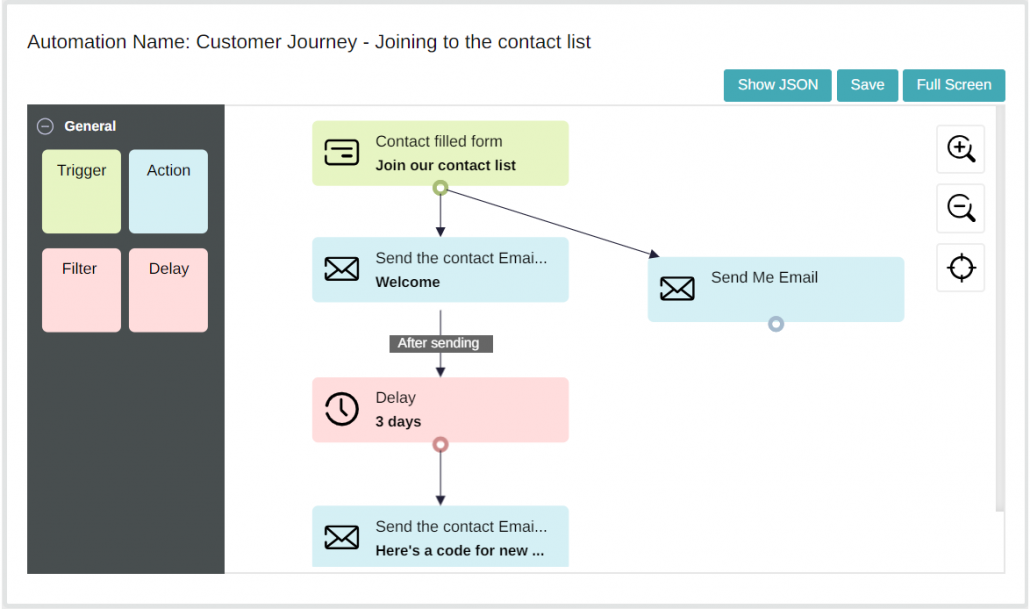
Example of a customer journey:
The journey begins when a new member joins the ‘New Customers’ contact group > An email will be sent immediately saying, ‘Great that you’ve joined us > Simultaneously, an email will be sent to the account manager to inform him about the new contact > After three days, a discount code will be sent via email.
It’s a good idea to plan the customer journey in advance, decide what you want to send and when, and create the relevant content accordingly:
Start by creating a new contact group: ‘New Customers’.
Add new registrants who filled out a landing page, pop-up, signup form on your website, or uploaded contact lists to this group.
Immediately after registration, send an email saying, ‘Welcome’
Simultaneously, send an email to the account manager to keep them updated about the new contact.
After three days, send an email with a discount code to the new members.
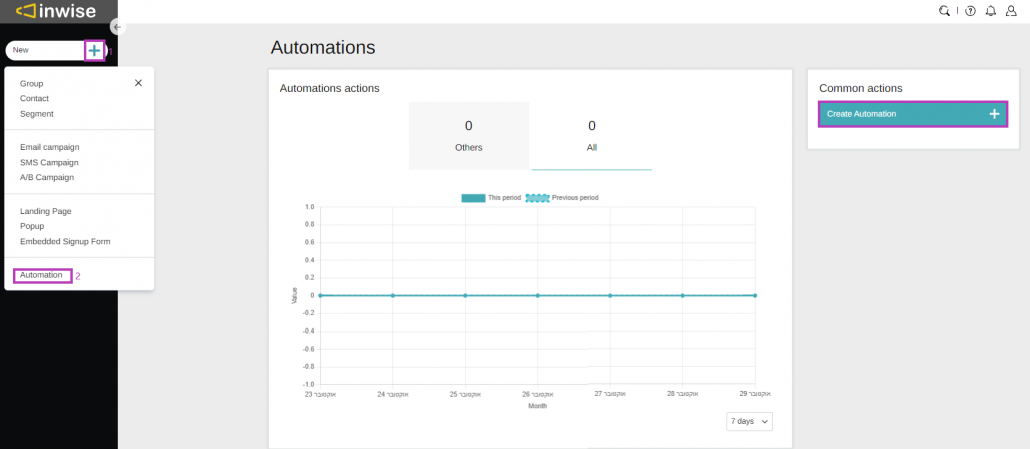
Hot to create this automation
Create new automation, clock on the plus icon +(1), select “Automation” (2)
Edit the trigger by clicking the pencil icon (1).
In the “Trigger Type” field, choose “Contact added to group” from the list (2).
In the “Group Name” field, select the right group (3).

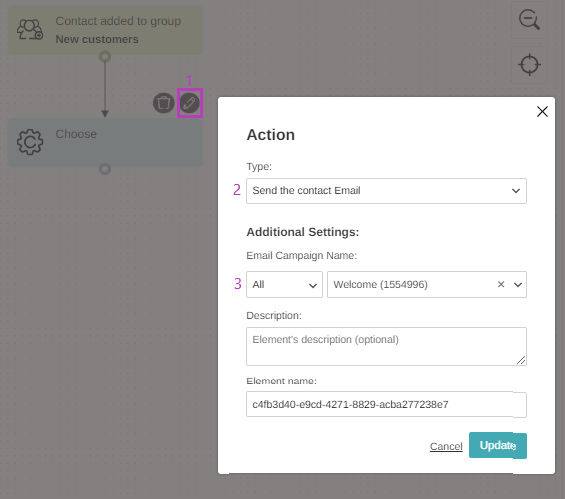
Right after someone joins the group, we want to send an email saying “Glad you joined us.”
To do this, edit the action by clicking on the pencil icon (1).
In the “Action Type” field, choose “Send the contact Email” from the list (2).
In the “Email Campaign Name” field, select the relevant campaign (3).
At the same time, you can add another action – to send an email to the account manager if they need to stay updated with this information.
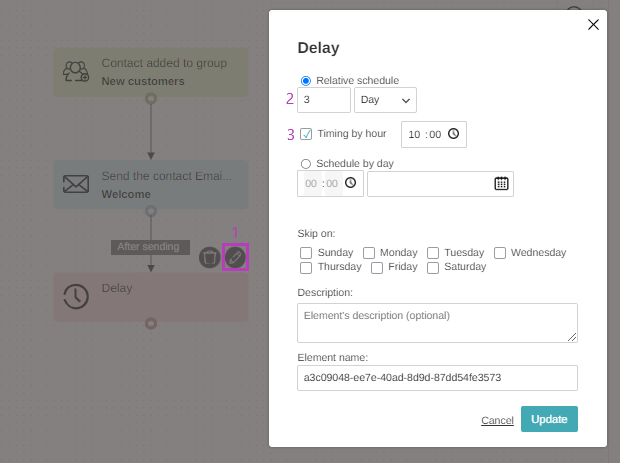
In the next step, let’s set it up to send an email with a special offer coupon code to new members three days after they join.
To do this, drag the delay component to the automation editor window (the right dotted window).
By clicking on the edit pencil (1), you’ll open the edit window and choose a relative timing – update it to 3 days (2) and set the delivery time (3).
In this journey, you can add additional actions based on the needs and requirements of your business.