
Knowledge Base > Campaign > Create and edit an email campaign
With inwise, you can create an email campaign quickly and easily with the convenient Drag & Drop editor.
Steps to creating an email campaign:
Step 1 – Campaign design
Step 2 – Campaign settings
Step 3 – Select the contact list
Step 4 – Summary and send
1. Campaign Design
You have two options at your disposal when creating an email campaign with inwise:
Option 1 – On the main login screen, click on the “Campaigns” tab in the main menu bar on the left (1). Next, on the “Common Actions” menu, click the “Create an email campaign” button (2).
You can also select “Create an email campaign” directly from the main menu bar.
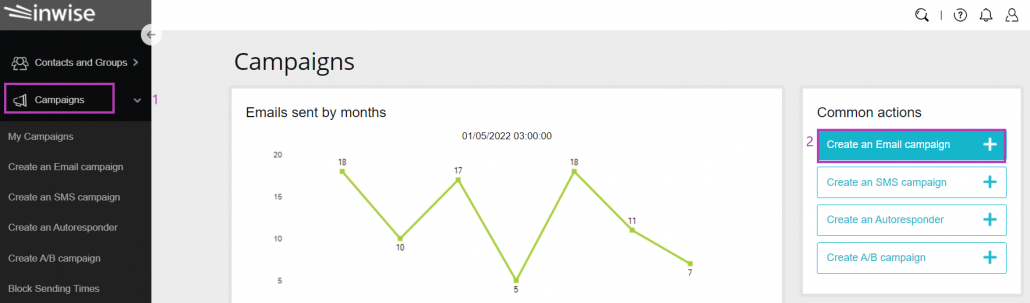
Option 2 – Under the “Campaigns” pane on the main login screen, click on the arrow next to “Create Campaign.” Then, click “Create an email campaign” on the menu that opens (2).

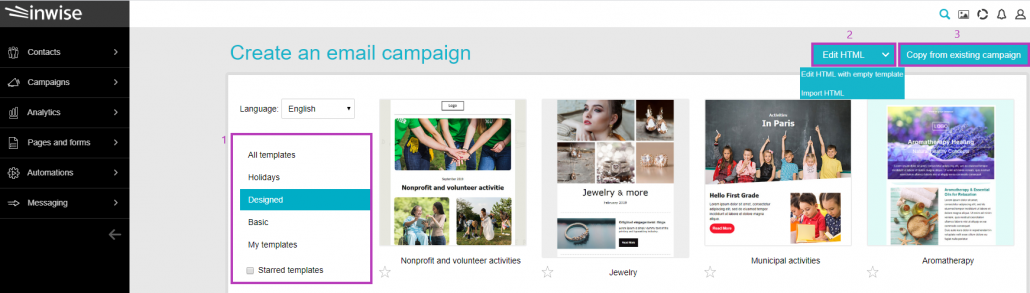
Once you are on the “Create an email campaign” page, select your preferred template. You can choose a designed template from inwise’s selection, or design a new campaign from a basic template (1).
* You can edit and format the campaign independently by clicking “Edit HTML with an empty template” (2). Users who have a code, file, or link to the server where their campaign is stored can also import an HTML file.
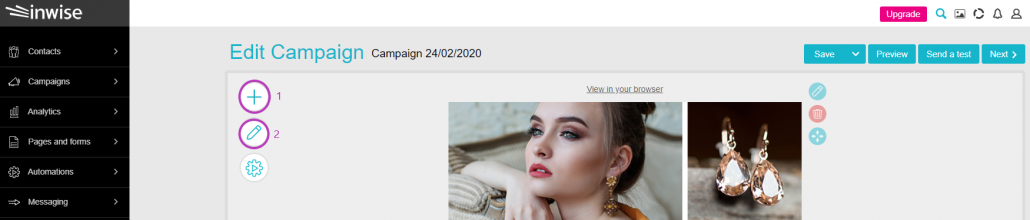
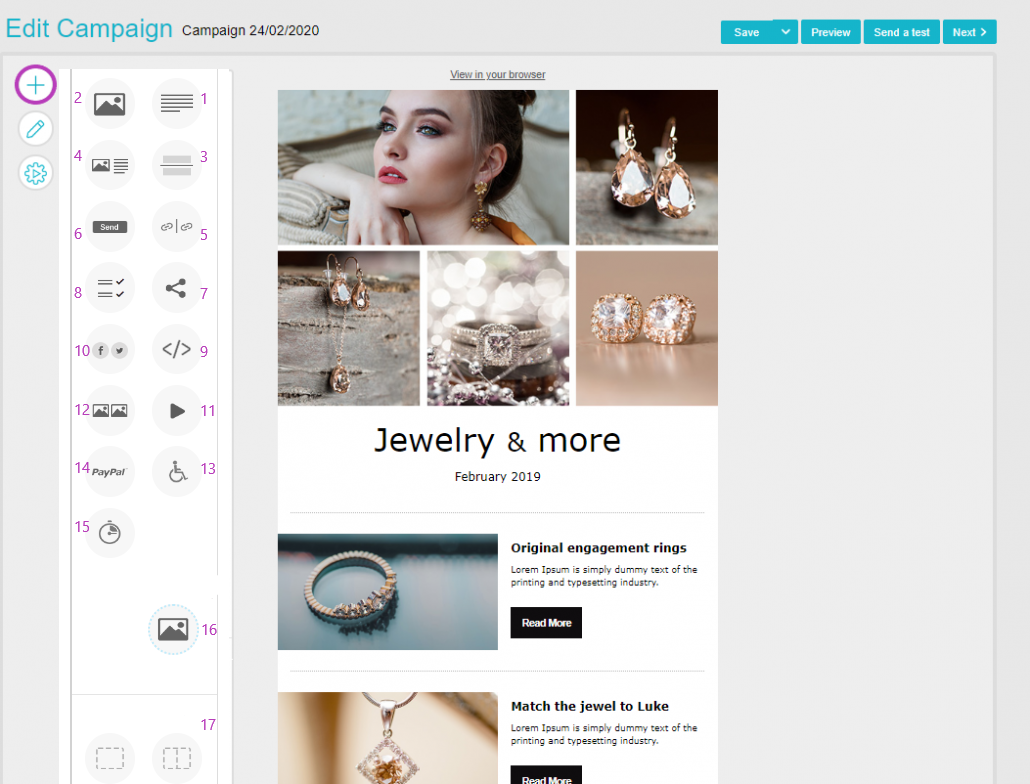
After you select your template, the content editor will open. This is where you can add pictures, edit content and design the campaign with a variety of elements.
Campaign design menu:
Clicking on the pencil icon (2) will open the design menu, where you can influence the design of the entire campaign by:
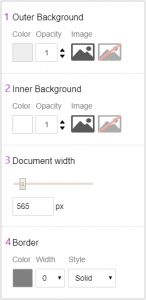
- Changing the outer background color, setting the color and opacity, and selecting a background image from the media area.
- Changing the inner background color, setting the color and opacity, and selecting the background image from the media area.
- Document Width – Setting the campaign display width to 1,000 pixels.
- Border – Defining the color, thickness and style of the border.
Add element menu:
Clicking the “+” icon (1) will open the “Add elements” menu. You can add elements to each campaign by dragging and dropping to the relevant area in the template:
- Text – For adding, editing and designing text. Clicking on the text will open a formatting menu.
Tip: Use simple terms, such as “Buy” or “Sign.” Don’t complicate your contact by trying to sound smart. - Image – You can add an image from the media area in your account or upload a file from your desktop. Every image you upload is saved in the media area.
You can edit images with the photo editor on the platform. You can find more information on this in the Media Area Guide. - Breakline – You have the option to add a visual partition between different elements.
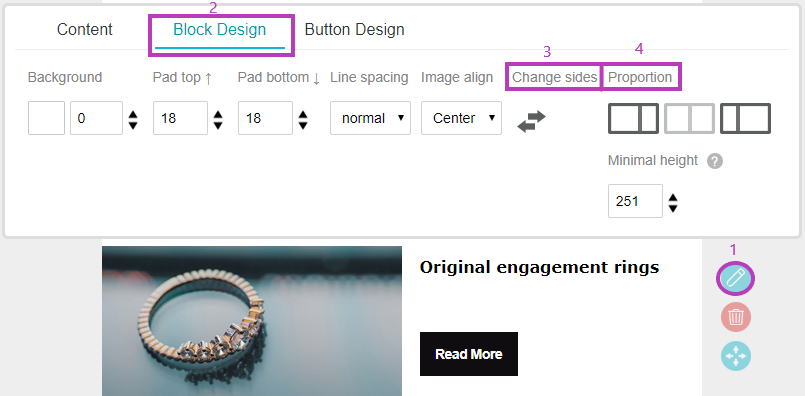
- Article – You can display a modular component of text alongside an image. This is ideal when previewing an article with a link embedded as a button prompting the recipient to continue reading.
You can switch between the text and the image sides – after dragging the element to the relevant position in the template, click the “Edit element” pencil icon (1), “Block Design” (2) and “change sides” (3). You can also define the proportion of the text to the image (4).
- Links – You can add links for products, services or whatever else you wish. Copy the URL, and paste it into the template.
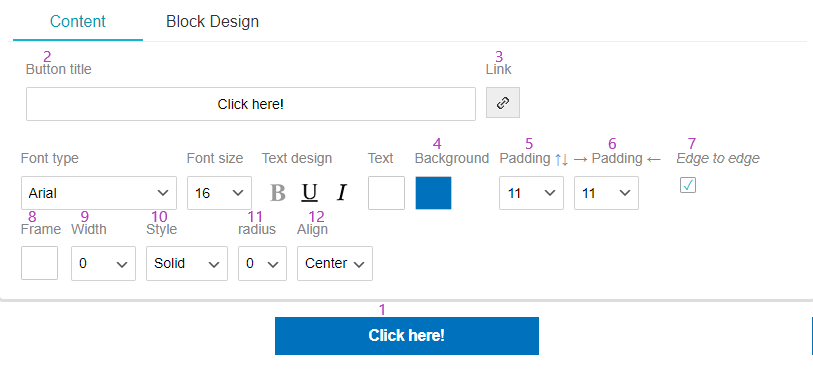
- Button – You can add a button with a link to a Website for purchasing or registration. Buttons play an important role in your signup form, as they drive the action for which you created the signup form in the first place.
To format the button click on it (1). In the pane that opens you can change the button title (2), font and size. To update the link address to which the button leads, click on the link icon (3) and update the destination address in the panel that opens. You can select whether it will lead to URL or to another landing page on inwise (4).
Also, you can select the button size by padding: length (5), width (6), radius – how rounded or sharp the corners will be (11) and its alignment (12).
Add a frame (8) by setting the line width (9) and the line style (10).
Tip: Ensure the button is noticeable with a contrasting color. Make sure it will look different from the rest of the content (for example, you can design it like a pushbutton).
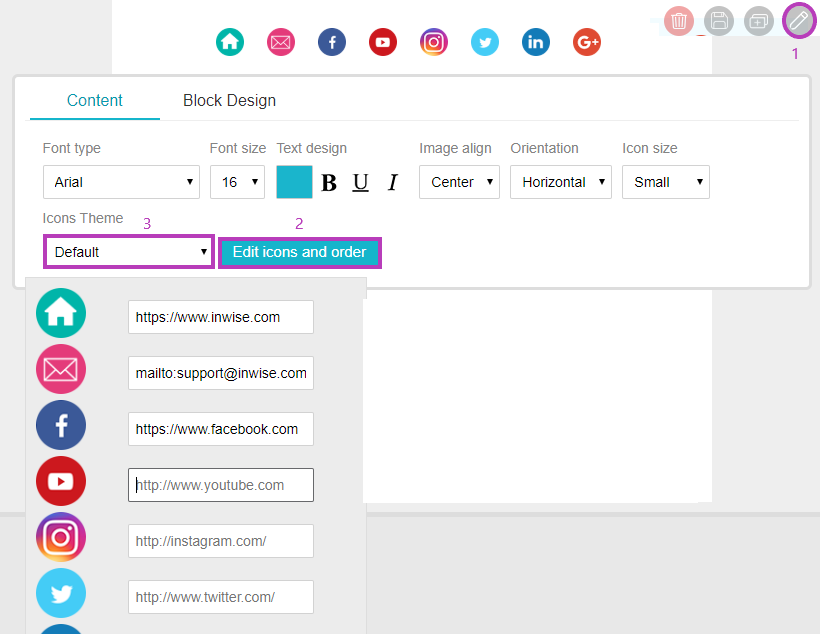
- “Follow Us” – You can add links to your company’s business page on different social networks.
To edit the icons, click on the little pencil button in the right corner (1). You can select different designs for the icon buttons by clicking on the “Icon Theme” (3).
To update the icon links, click on “Edit icons and order” (2). Clicking on each social icon and turning it dark will remove it. Clicking on the icon again to illuminate it will reactivate it. Enter the relevant URL in each icon’s field by copy-past.
You can also change the order of social networking icons by dragging them up or down.
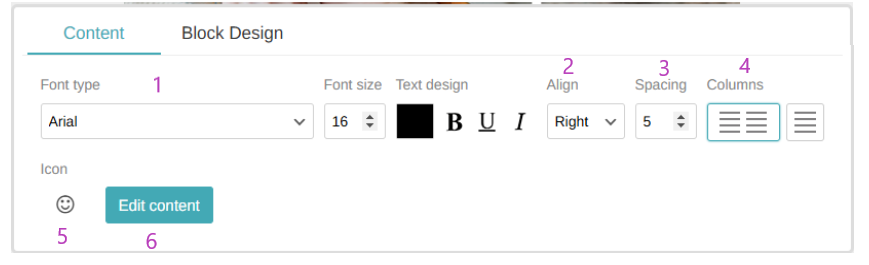
- Bullets – A modular component that displays a list of key points alongside an icon. This feature enhances content readability.
After dragging the component into the template, clicking on it will open an editing panel where you can:
Adjust the font style, size, and color (1).
Align or center the text (2).
Set the spacing between points (3).
Choose whether to divide the list into two columns or keep it in a single column (4).
Select the style, design, and color of the bullet icon (5).
Edit the content of each point (6).
- HTML Code – You have the option to add a pre-existing HTML code to the landing page.
- Share – This element allows the recipient to share the email they received from you on one their social media pages.
- Video – You can add video links from YouTube or Vimeo by copying and pasting the URL.
- Gallery – Combine 2 pictures side by side.
- Accessible Version Tag
- PayPal – if you have a PayPal account, you can add a button to the product you are selling.
- Timer – You can add a live Countdown Timer element. To edit the timer, click on it. In the pane that opens you can update the target date (1) and target time (2).
You can remove the day count and display only a stopwatch by checking the “Remove days” box (3). You can also edit the background color, font, clock configuration style (square or round) (4) and set the clock width (5).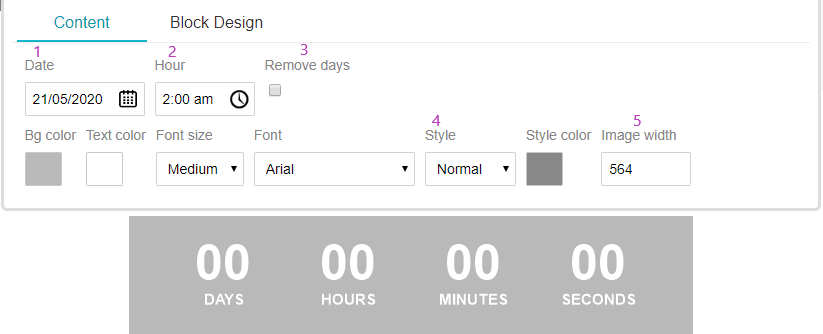
- Saved Elements – You can save your design elements and use them in your future campaigns. Click on the element you want to save, and in the menu that opens, click on the “Add to Saved elements” icon
 .
.
Type the element’s name, and save.
To add a saved element to future campaigns, select it from the menu and drag it to the relevant location.
- Add Area – At each editing stage, you can divide the template into two, three or four columns. This provides a great deal of flexibility during every stage of construction and design.
At the top of the editor screen, there are 2 buttons:
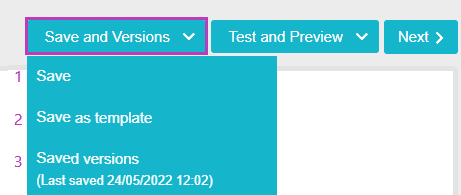
- Save and Version(1)– Clicking on this button will save the campaign changes. Clicking the small arrow on this button allows you to restore recently saved versions (3) or save the formatting as a template in your account for future use (2).
- Test and Preview – Preview your campaign on mobile and desktop (2).

- Send a test (1)- While you finish editing your campaign, you should send a test for yourself and a test group to review. This way, you can check the campaign’s propriety and visibility on your browser and email software before sending it to your contact list. You can continue editing and designing the campaign after sending the test until it is approved for final sending.
Clicking on “Send a test” saves your changes and allows you to select your test group.
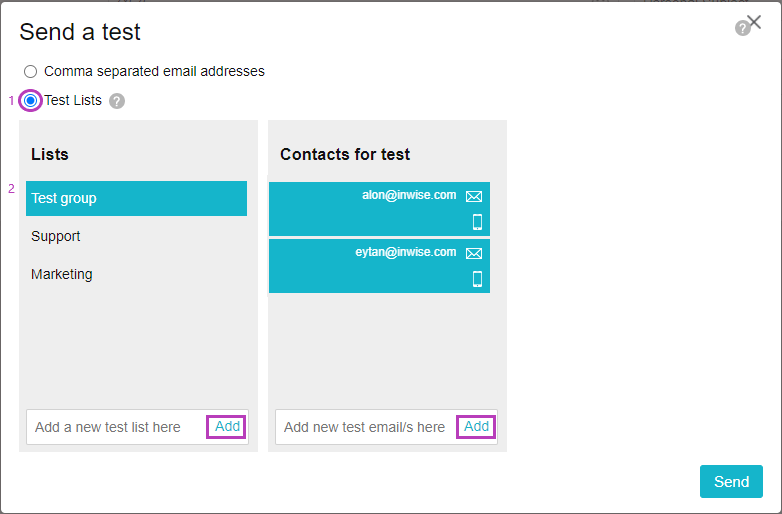
After clicking “Send for review,” your campaign will be saved and a pane will open. Here, you can select and update the contact information for your test group:- Email addresses (separated by commas) – Send the current campaign to one-time contacts.
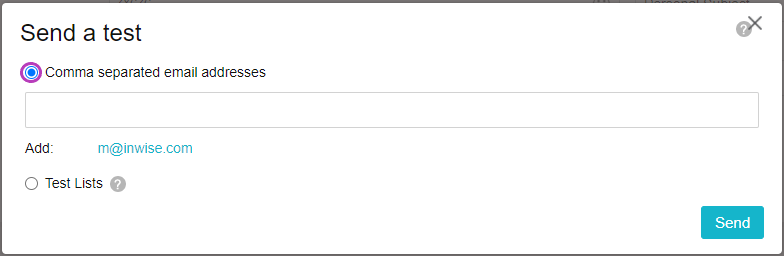
- Test lists – Defining fixed lists for sending (1):
– Lists (2): Define the group name (contact list) and click “Add”.
– Contacts for a test: Enter your group members’ email addresses (4) and click “Add.”Click “Send” – the message will only be sent to the selected email within the test group.
- Email addresses (separated by commas) – Send the current campaign to one-time contacts.
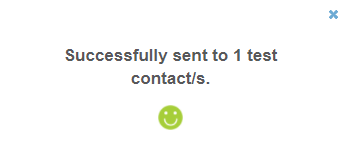
After sending the test, you will see a pane verifying that it went out.
Make sure you received the campaign, and then check its visibility, test that the links are working, and verify that the information appears correctly, especially the subject line, sender’s name and reply email address.
2. Campaign Settings
On the “Campaign Settings” screen, define your email subject and campaign name.
Email subject: This captures the gist of your campaign, and it is what contacts will see in their inbox when the email is delivered.
Put a lot of thought into the subject, as this is what will make your contacts decide whether to open the email or not.
Campaign Name: This is only for internal use. It will appear in the system’s campaign list, but it will not be visible to your contacts.
Show Sending Profile: These are campaign-level settings, which you can change in each campaign individually (1). Learn more in the Sending profiles guide.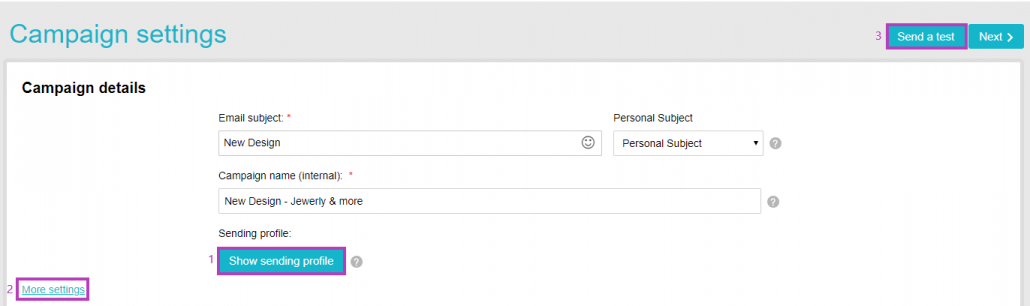
More Settings – This button lets you edit and view additional settings. These are fixed to your account, but they are changeable if needed (2).
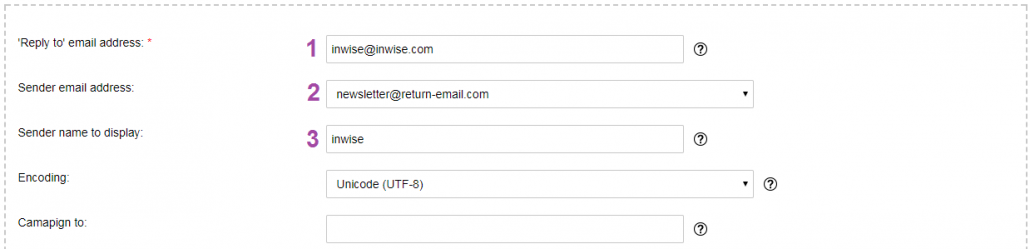
- ‘Reply to’ email address – This is the address that will appear if your contact wants to reply to the campaign email he received. You can change it in the account phase or the campaign phase.
- Sender email address – This is the address from which your contacts are receiving your emails. To change this address, contact our support team (For example: newsletter@yourdomain.co.il.) If you want to upgrade the deliverability rates, define inwise SPF on DNS servers.
- Sender name to display – This is the campaign sender’s name. It can either be your company’s name or an employee’s name, and you can change it for each campaign.
After you are finished adjusting the settings, click “Next” on the bottom-right corner of the screen.
3. Select the contacts list
Once you are finished with editing the design, it is time to actually send the campaign.
On the Editor page, click “Next” on the bottom-right corner. You will land on the groups or segments selection page.
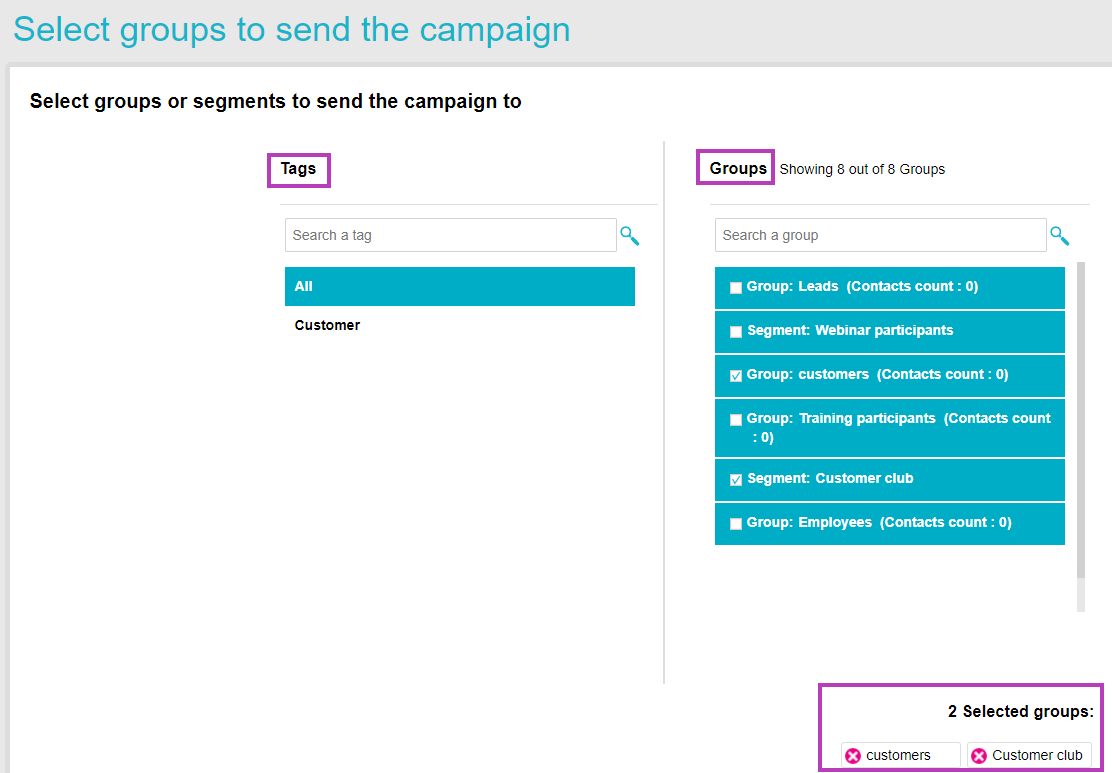
On the left side, you can search and select tags connected to your groups (optional).
On the right side, select the groups to which you want to send the campaign
Pay Attention:
- Add or remove groups by clicking on the checkbox next to their name.
- On the bottom right side of the page, you’ll see the groups you have selected. You can undo your choice by clicking the x next to their names or unchecking their box in the Groups list.
- Some contacts may appear in multiple groups, but the inwise system knows to send the campaign to those contacts only once.After selecting the appropriate groups, click “Next” at the bottom of the screen.
4. Summary & Send
This is where you can see your campaign schedule and approve emails to be sent.
On this page, you will see all of the campaign details, such as the campaign name, subject, sender name, groups to which the campaign will be sent, and previews of emails, which you can enlarge.
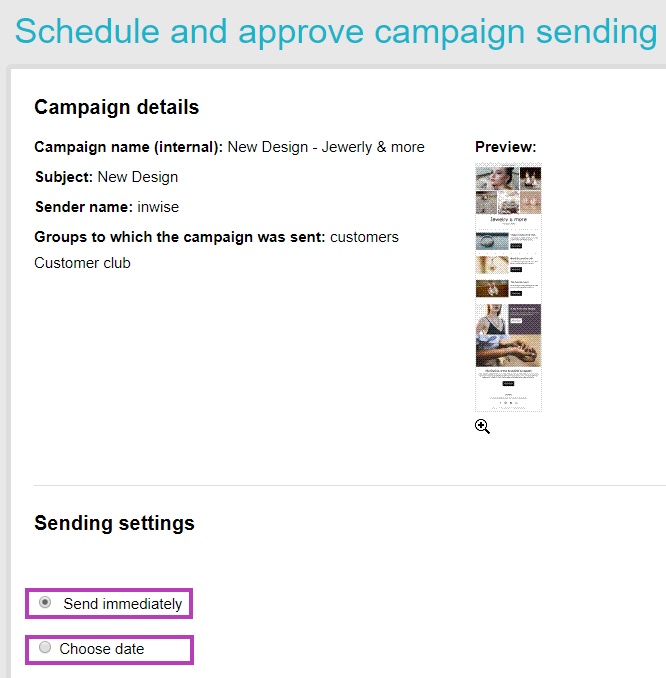
You can send the campaign immediately, or schedule it for later.
If you want to send it right now, select “Send immediately.”
If you want to schedule the email for later, click “Select date.”
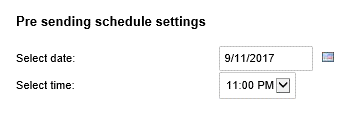
Click on the calendar icon to select the date, and then select the time.
Next, click on “Send campaign.”
You will get a message asking you to confirm that your campaign is ready to be sent.
If you want to confirm, click on “Yes” and the sending will begin right away or according to the schedule, depending on your scheduling choice.
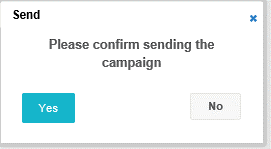
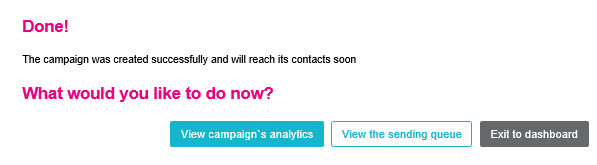
After clicking on “Yes”, you will receive a message that the campaign was successfully sent.
You don’t need to stay logged into the inwise system for your campaign to finish sending; this will happen automatically.
After sending, you can choose how to continue:
View Analytics, View the sending queue, or Exit to the dashboard.
The next time you want to submit a campaign or newsletter, you can duplicate an existing campaign and update its design. This saves time on redesigning. To do this, click on the “Duplicate” button under the relevant campaign on the list campaign screen. Now, you can update the existing design and continue with the process of sending the campaign.
After submitting your campaign or newsletter, continue strengthening the relationship with your recipients. One way to do this is by sending SMS messages that provide a deal on one of the products or services that appeared in the initial email campaign. After examining your recipients’ behavior, you can divide them into groups: those who opened the email, those who just clicked without opening, and those who did not open emails from you at all. Send each of these groups a different SMS with tailored content. Here’s’ how to do it – SMS sending system