
Knowledge Base > Campaign > Reply email address
There are two options for setting the reply email address:
- Update during email editing
- Update in account settings
For a guide on sending profiles – click here.
Setting the reply email address during campaign editing
Update different settings for different campaigns
During the editing of an email campaign, on the “Campaign Settings” screen, click on “Show Sending Profile” (1).
You can choose to “Create New Profile” or edit a profile that you have already created.
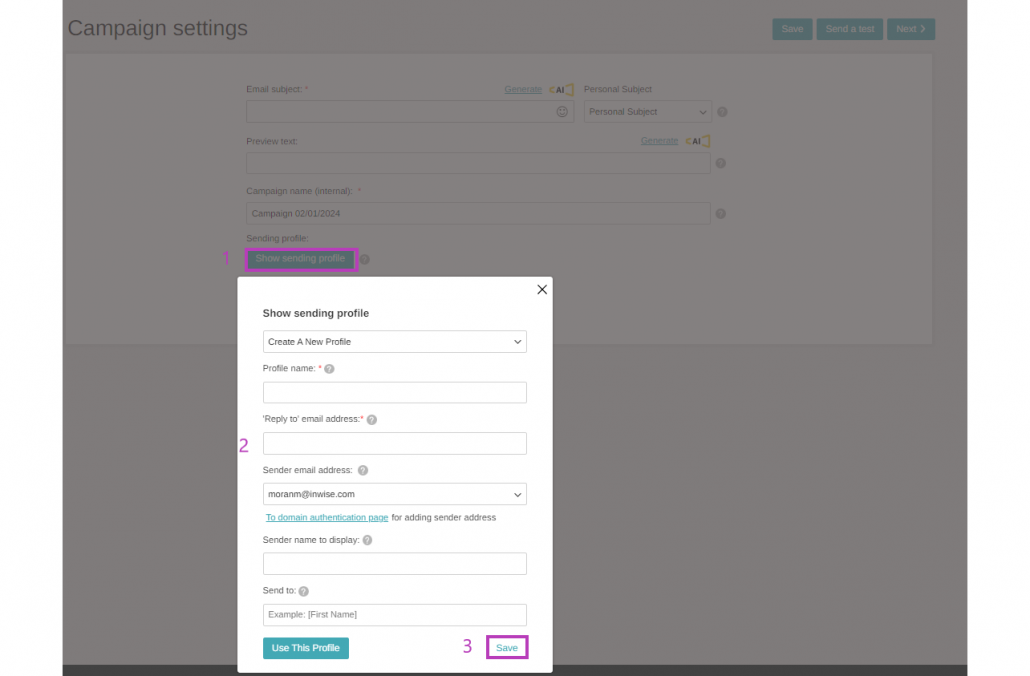
“Profile name”: Enter the profile name. This field is internal, only for your own use.
“Reply to”: Enter the e-mail address for the contact’s responses (2)
“Sender email address”: Enter the e-mail address that will appear in the e-mail.
“Sender name to display”: Enter the name of the sender from which the email will be sent.
Finally, click “Save” and then on “Use This Profile”.
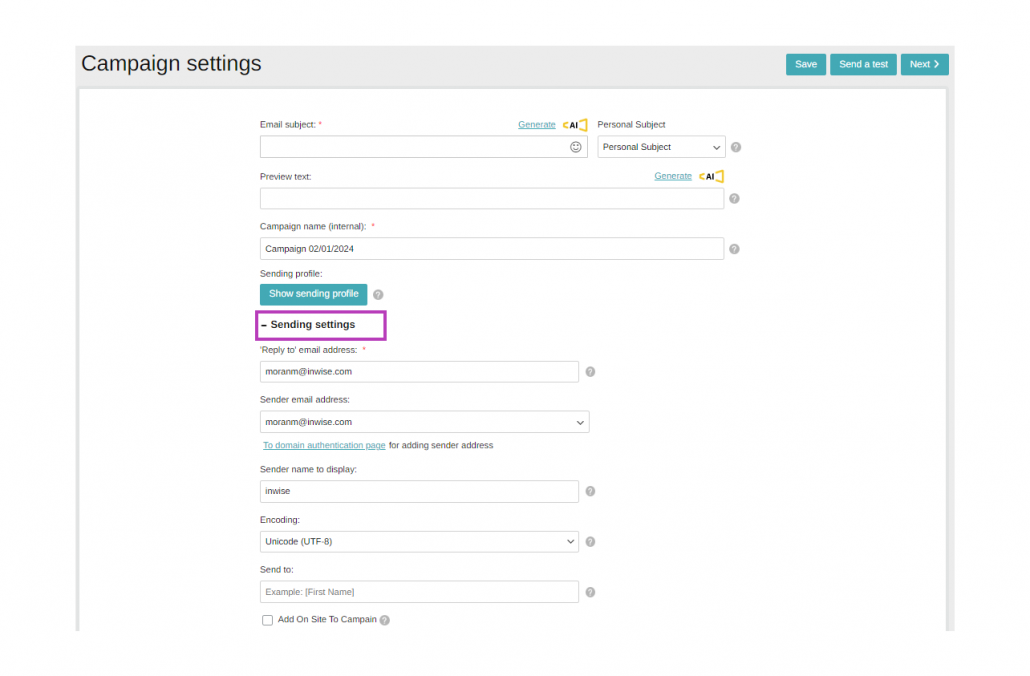
Update default settings for all campaigns.
On the same screen as “Campaign Settings,” you can click on “Sending settings” and update the reply email address as well as other details.
Setting the reply email address during account settings
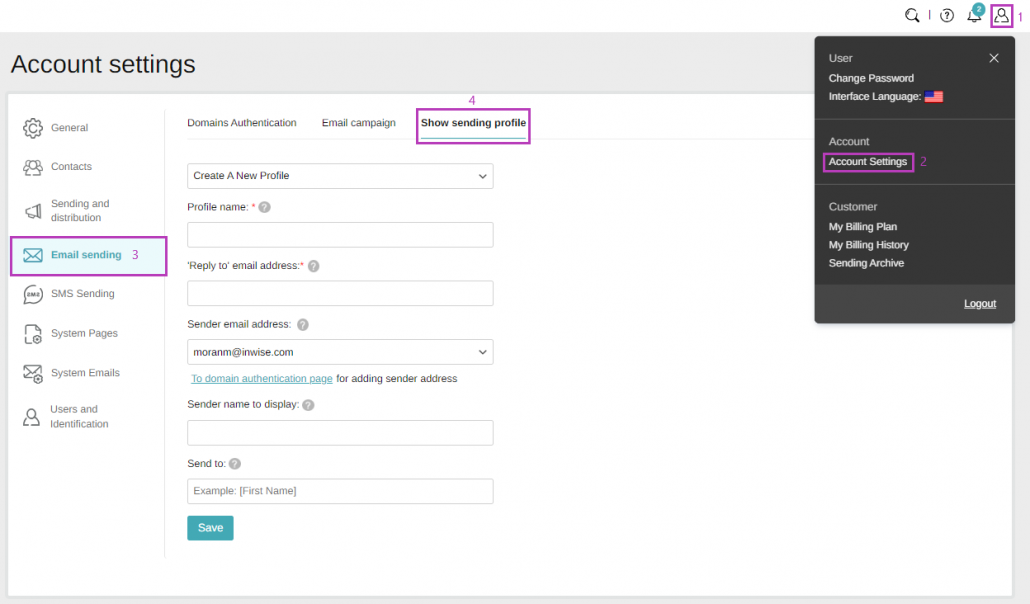
Click on the “Little Man” icon at the top of the screen (1), then click on “Account Settings” (2).
On the sidebar click “Email Sending” (3) and in the top menu, select “Show sending profile” (4).
In this window, you can update the email address to which your contacts can reply.
You can also update additional details such as the sender’s name and email address which will be displayed in the contact’s email box .
Finally, click on the “Save” button. These are the default settings for all the campaigns you send.
Now, you can continue to design your email campaign. More information in this guide