
Knowledge Base > Account Settings > Sending profile – sender name and email address
It is recommended that the sender’s name include the company name and if it is a private person, then of course, the full name.
There are two ways to set up the sending profile:
- Update default settings for all campaigns.
- Update different settings for different campaigns.
1. Update default settings for all campaigns.
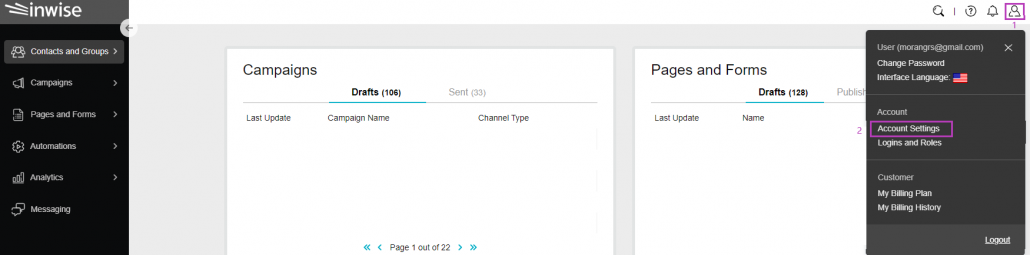
Click on the “Little Man” icon at the top of the screen (1), then click on “Account Settings” (2).
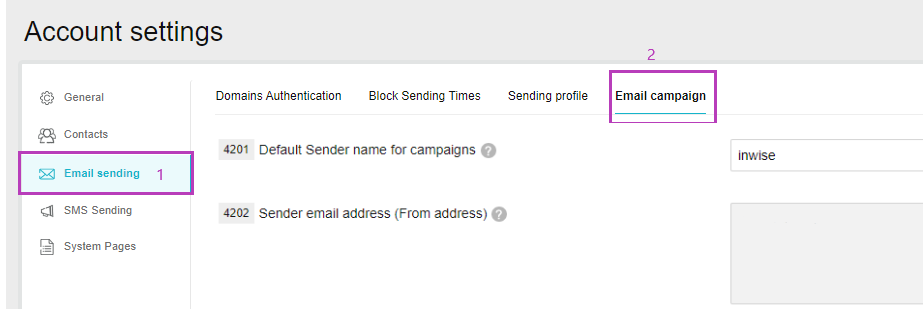
On the sidebar click “Email Sending” (1) and in the top menu, select “Sending profile”:
Setting number 4201 – “Default Sender name for campaigns”: Enter the sender’s name that will be displayed in the mailer. Your contacts will see this name in their mailbox.
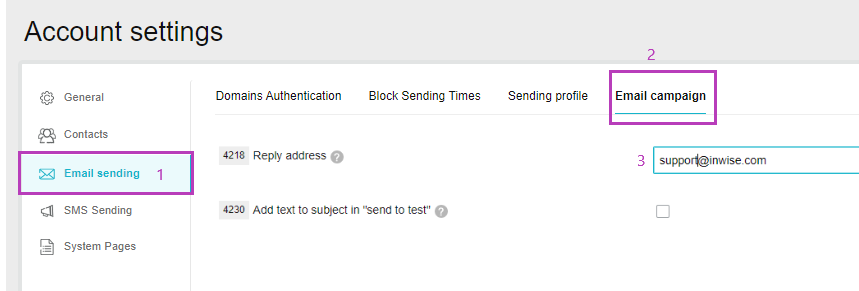
Setting number 4218 – “Reply address”: Enter the e-mail address for contact’s responses.
Tip: We recommend you to go through all the settings on this page and update them if necessary, since these are the default settings for each campaign you will send.
Finally, click “Save”.
2. Updating different settings for different campaigns.
On the sidebar click “Email Campaign” and choose “Create an Email Campaign” (2).

On the “Create an Email Campaign” screen, click “Show Sending Profile”.
You can choose to “Create New Profile” or a profile that you have already created.
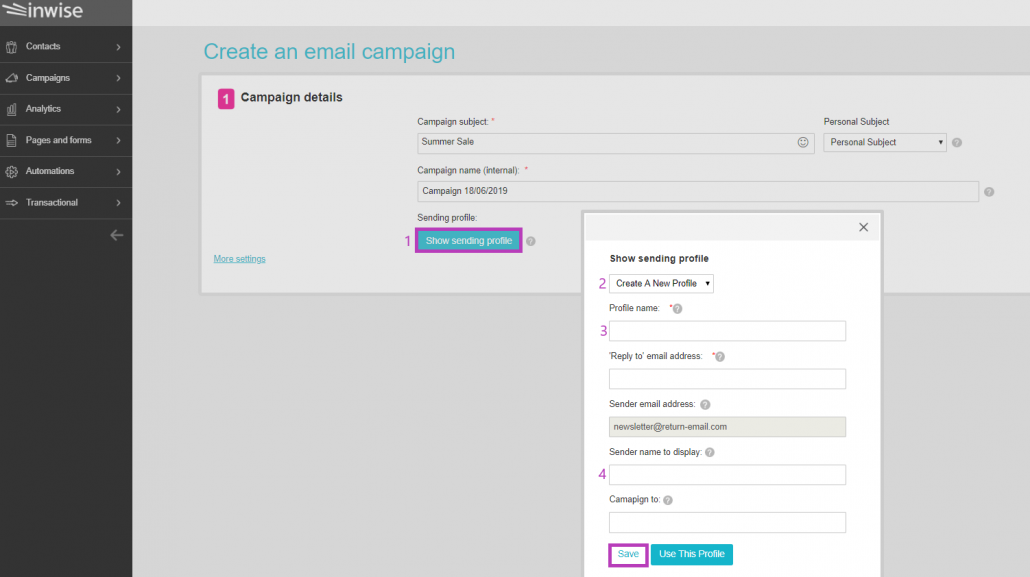
“Profile name”: Enter the profile name. This field is internal, only for your own use.
“Reply to”: Enter the e-mail address for the contact’s responses.
“Sender email address”: Enter the e-mail address that will appear in the e-mail.
“Sender name to display”: Enter the name of the sender from which the email will be sent.
Finally, click “Save” and then on “Use This Profile”.
Now, you can continue to design your email campaign. More information in this guide