
Knowledge Base > Contacts > Create Segmentation
Proper segmentation will allow the delivery of tailored and targeted marketing messages only to the contacts for whom the information is relevant, so that the results of the marketing activity will be better.
For example, you can create a segmentation of contacts who are interested in studying during the month of October and also live in the northern region. The system is based on the data that appears in the fields defined in the system, which identifies the relevant contacts from all the groups you have selected and creates a new group from them.
The creation of segments does not harm or change the original contact groups but creates a dynamic new group that is constantly updated.
Examples of segments:
- Contacts who joined the customer club during the last month
- Customers whose birthday falls next month
- Employees in the organization who started working in the last week
- Contacts who have started an email campaign 3 times or more
- Contacts who were interested in studies and also live in the northern region
Steps for creating segmentation:
- Check and configure information fields for contacts
- Create segmentation
Step 1 – Check and configure information fields for contacts
Segments are based on the information fields that exist in the system. Therefore it’s important to check their settings.
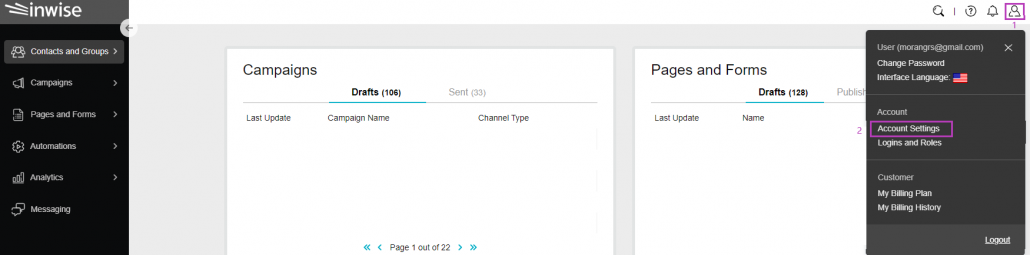
Click on the “Little Man” icon at the top of the screen (1) and then click on “Account Settings” (2).
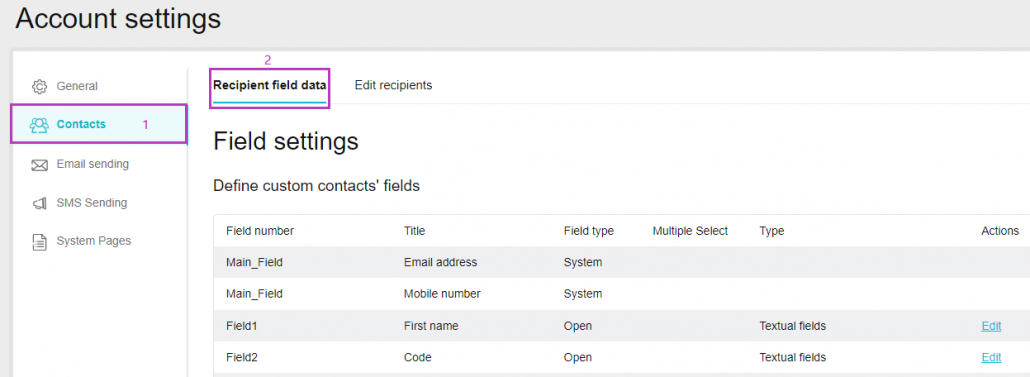
On the side bar click “Contacts” (1) and in the top menu, select “Recipient field” (2).
In the Field pane you can check your field settings, add fields, and change them. More information about editing fields is available in this guide.
Step 2 – Create segmentation
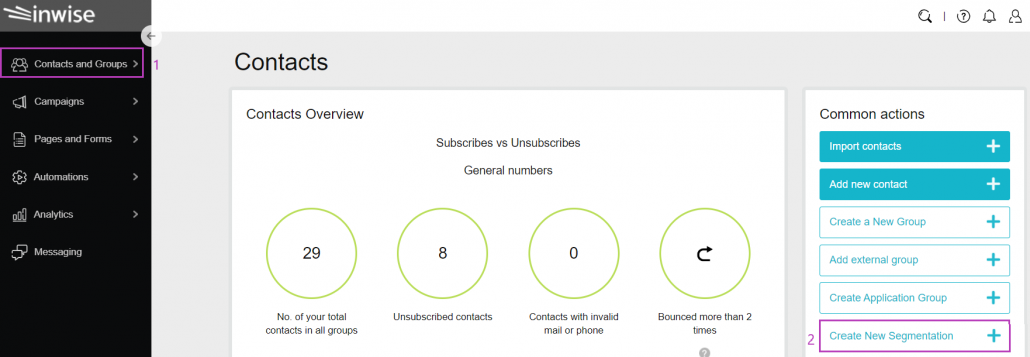
To create a new segmentation, click on the “Contacts” tab in the main menu bar on the left (1). On the “Common Actions” pane, click on the ”Create new segmentation” button (2).
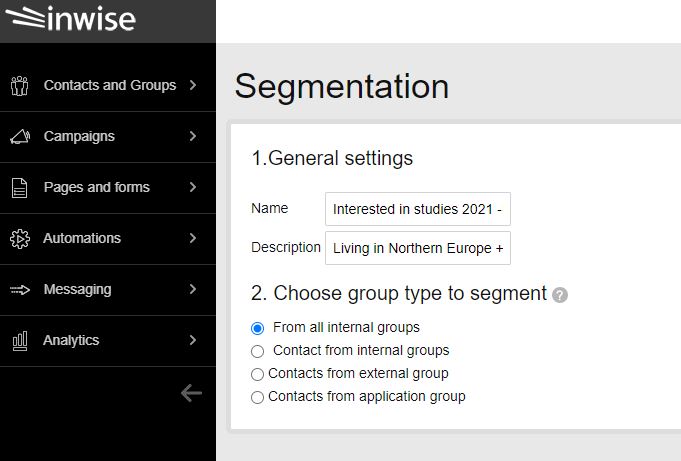
On the “Segmentation” screen, enter the segment name and description (optional).
You can choose the type of group to segment your contacts with: from all internal groups in the system, from some of the groups, or from an external group (interfacing groups that are synchronized directly to the database) or from application group.
Once you have selected the group type, click on the “Create New Query” button at the bottom right of the screen.
To add more segmentation settings, click on the “Add Condition” button (4) and add more fields.
Field 1 – Select the field according to the segmentation that will be performed. The existing categories are: browsers and operating systems, contact actions, and contact fields as you have defined in your account.
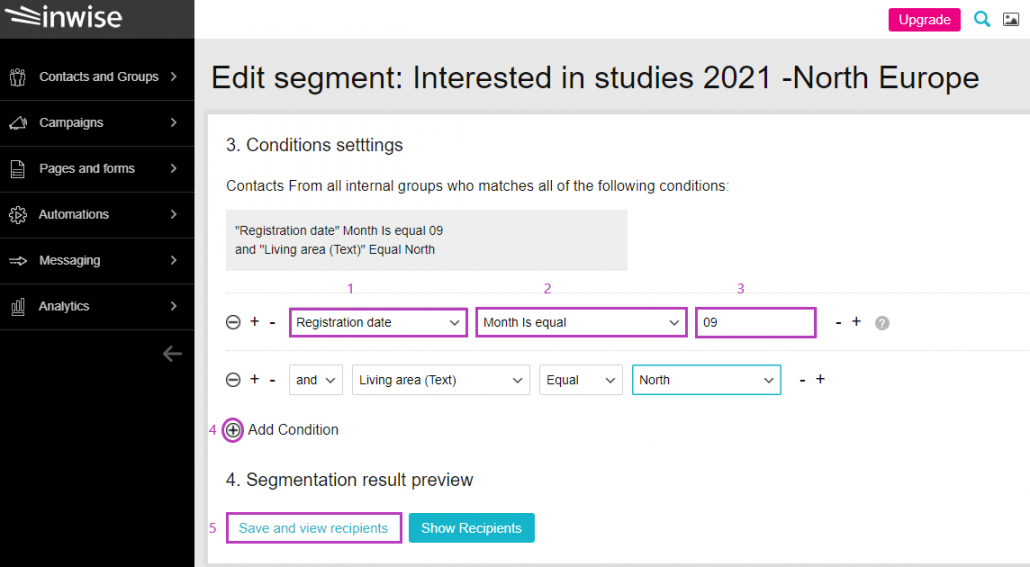
Field 2 – Defines the segmentation condition – inwise has a wide range of conditions.
Depending on what you select in field 1 (e.g. date field), a panel will open in field 2 with different options of segmentation conditions.
Field 3 – will open according to the condition chosen in field 2.
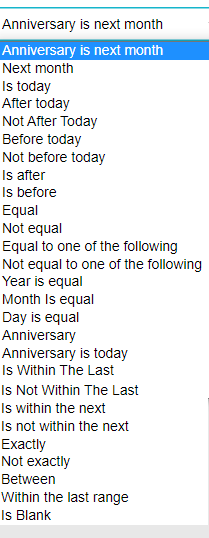
Listed below are the existing conditions for field 2:
- Anniversary is next month – The segmentation results include only those whose date value will be updated next month, regardless of the day and year. For example, if we perform the segmentation on 2/3/21, all the contacts that will celebrate an anniversary in April, no matter the year, will appear.
- Next month – The segmentation results include only those whose date value will be updated next month in the current year, without regard to the day.
For example, if we segment by 2/3/21, all the contacts that will join the organization in April 2021 will appear. - Is today – Only those whose date value is up to today will appear in the segmentation results.
For example, if we perform the segmentation on 2/3/21, all the contacts that will join the customer club today on 2/3/21 will appear. - After today – The segmentation results include only those whose date value is from tomorrow. For example, if we perform the segmentation on 2/3/21, all the contacts that will join the customer club from tomorrow, 3/3/21, will appear.
- Not after today – The segmentation results include only those whose date value is until today. For example, if we perform the segmentation on 2/3/21, all the contacts that have joined the customer club before today and all those joining today, 2/3/21, will appear.
- Before today – The segmentation results include only those whose updated date is until yesterday (including yesterday).
For example, if we segment on 2/3/21, all contacts who joined a customer club on or before 2/3/21 (inclusive) will appear. - Not before today – The segmentation results include only those whose updated date is until today (including today).
For example, if we segment by 2/3/21, all contacts that joined a customer club on or after 2/3/21 (inclusive) will appear. - Is after / Is before / Equal / Not equal – Selecting this condition will open another field in which you have to set the date for the segmentation.
Equal to one of the following – You can set plenty of dates, which will be taken into account, in the segmentation results. - Not equal to one of the following – You can set plenty of dates, which will not be taken into account, in the segmentation results.
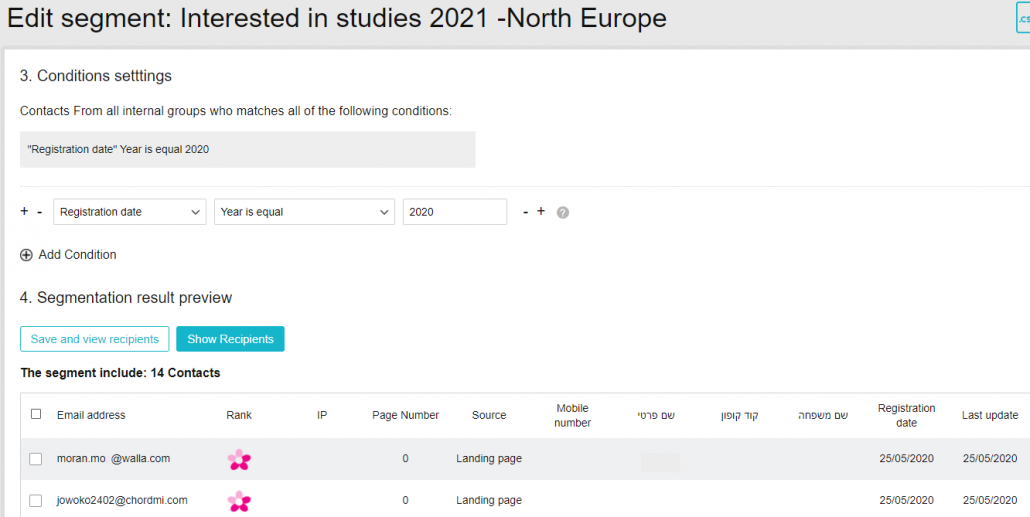
- Year is equal – Selecting this condition will open another field in which you have to define the year for which the segmentation will be performed (regardless of the day or month). For example, if we set the segmentation to 2020, all the contacts that joined the customer club during 2020 will appear.
- Month is equal – Selecting this condition will open another field, in which you have to define the month for which the segmentation will be performed.
For example, if we set the segmentation to month “3”, all the contacts that joined the customer club during the month of March in all years, will appear. - Day is equal – Selecting this condition will open an additional field in which you have to set the day for which the segmentation will be performed (regardless of month or year).
For example, if we set the segmentation to day “2”, all the contacts who joined the club on the 2nd of all months and years will appear. - Anniversary – Selecting this condition will open additional fields, in which you can define the date on which the segmentation will apply: before/in a few hours / days / weeks / months.
For example, contacts who joined 24 hours ago.
![]()
- Anniversary is today – The segmentation results include only those who are updated on the current day and month, regardless of the year.
For example, if we perform the segmentation on 2/3/21, all the contacts that will celebrate an anniversary on 2/3 will appear throughout the years. - Is within the last – Selecting this condition will open another field in which you must define the date from which the segmentation will begin (a few hours / days / weeks / months) until this moment. For example, if we perform the segmentation on 2/3/21 at 18:00, we can select “Hours” and update the number 5. All contacts who joined the club from 5 hours ago until this moment (range of 13:00 – 18: 00) will appear.

- Is not within the last – Selecting this condition will open another field, in which you must define the last range that will not be taken into account in the segmentation results (a few hours / days / weeks / months) until this moment. For example, if we perform the segmentation on 2/3/21 at 18:00, we can select: “Hours” and update the number 5. All contacts will appear except those who joined the club from 5 hours ago until this moment. (All contacts until 2/3/21 at 13:00).
- Is within the next – Selecting this condition will open another field, in which you must define the next date until which the segmentation will take place, from this moment until (a few more hours / day / weeks / months). For example, if we perform the segmentation on 2/3/21 at 18:00, and select “Hours and update the number 5, all contacts that will join the club from now until 5 hours ahead (range of 18:00 – 23:00) will appear.
- Is not within the next – Selecting this condition will open another field, in which you must define the next term that will not take into account the segmentation results from this moment until (a few more hours / days / weeks / months). For example, if we perform the segmentation on 2/3/21 at 18:00, and select “Hours” and update the number 5, all contacts that will join the club by this moment and five hours ahead will be excluded. Those who joined before 2/3/21 at 18:00 and those who start from today (2/3/21) at 23:00 will appear.
- Exactly -The segmentation results include only those who will update on that exact date.
- Not exactly – The segmentation results include only those who don’t update on that exact date.
- Between – Setting a time range – only those updated in this range will appear in the segmentation results.
- Within the last range – Selecting this condition will open additional fields in which you have to define the range from this moment and backwards (hours / days / weeks / months) to which the segmentation will apply. For example, if we perform the segmentation on 2/3/21 at 18:00, and select “Hours” and update the range between “4 and 2”, all contacts who will join the club on 2/3/21 between the hours of 14:00 – 16:00 will appear.
To save the new segment, click “Save and View Contacts”.
Example:
To segment the contacts who were interested during September and also live in north Europe, you have to define the following fields:
Last update date details > month equals > 09
and also
Living area > is equal to > north
Finally, in order to save the new segmentation group and see the contacts that appear in it, click on “Save and View Contacts” (5).
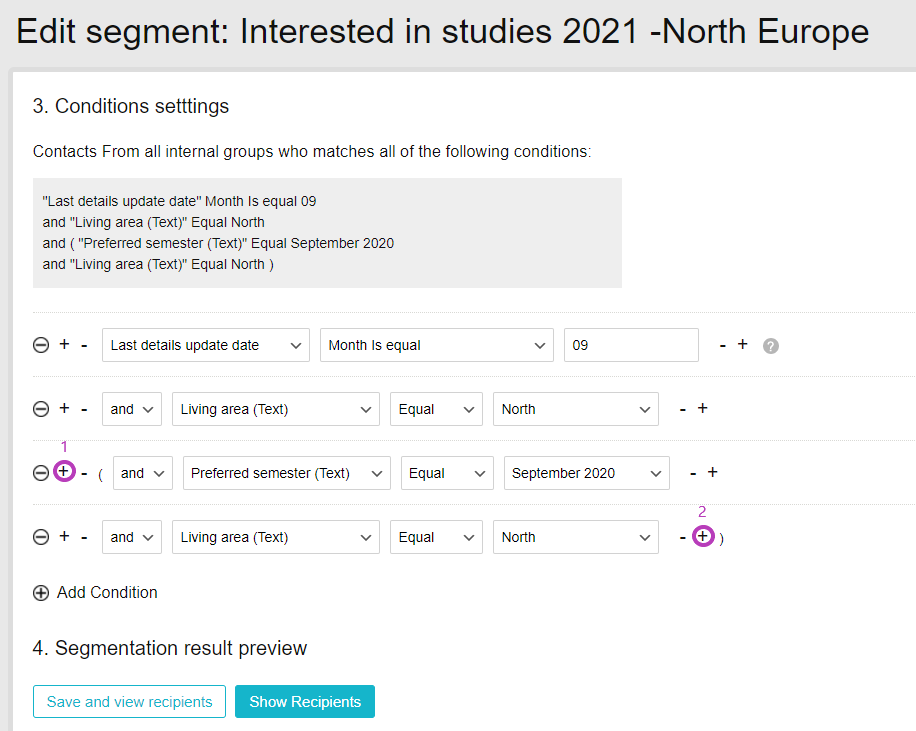
Complex segmentations can be created in the system by adding parentheses.
To do this, click ‘+’ next to the relevant field to open parentheses (1). At the end of the condition setting click ‘+’ to close parentheses (2).
In the current example, in order to segment contacts (who were interested during September + living in northern Europe) and in addition (preferred September 2020 + living in the northern europe), we added parentheses in the relevant places.
You can view the segmentation you created on the “Contacts” screen, which you enter through the “Contacts” tab in the main menu bar.
Now, you can build an email and/or SMS campaign that includes different marketing messages tailored to the various segmentation groups you have built.
How? Create and edit email campaign | Create an SMS Campaign