Knowledge Base > Contacts > Create and add tags
You can consolidate multiple contact groups under one title – one tag – or associate a contact group with several tags. This is an internal markup for your own use.
How to create a tag?
On the main login screen, click on the “Contacts” tab in the main menu bar on the left (1).
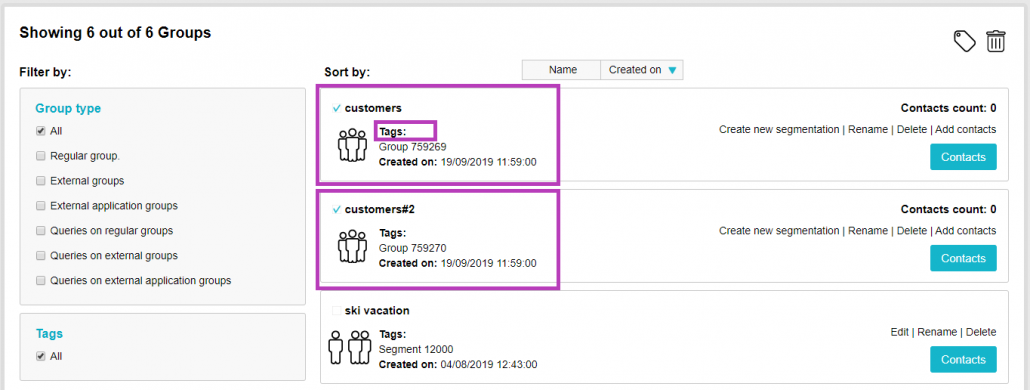
On the “Contacts” screen, scroll down to the group list and select the group you want to tag, by checking the checkboxes next to each group type.

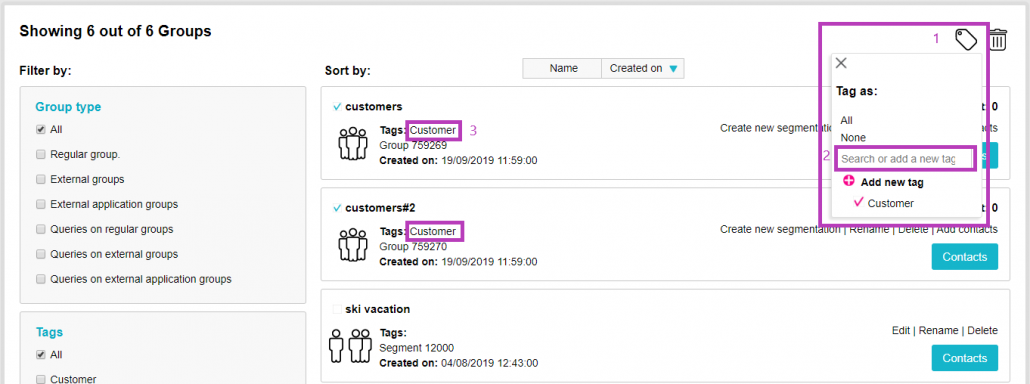
To add a tag to a group, click on the “Tags” icon, which is above the group’s list on the right (1) and select or create your tags of choice, which would display with a check ✓.
To create a new tag, type the name in the “Search or add a new tag” panel (2) and click the “+Add New Tag” button.
After selecting the tag, it will appear in the field of the contact group (3).

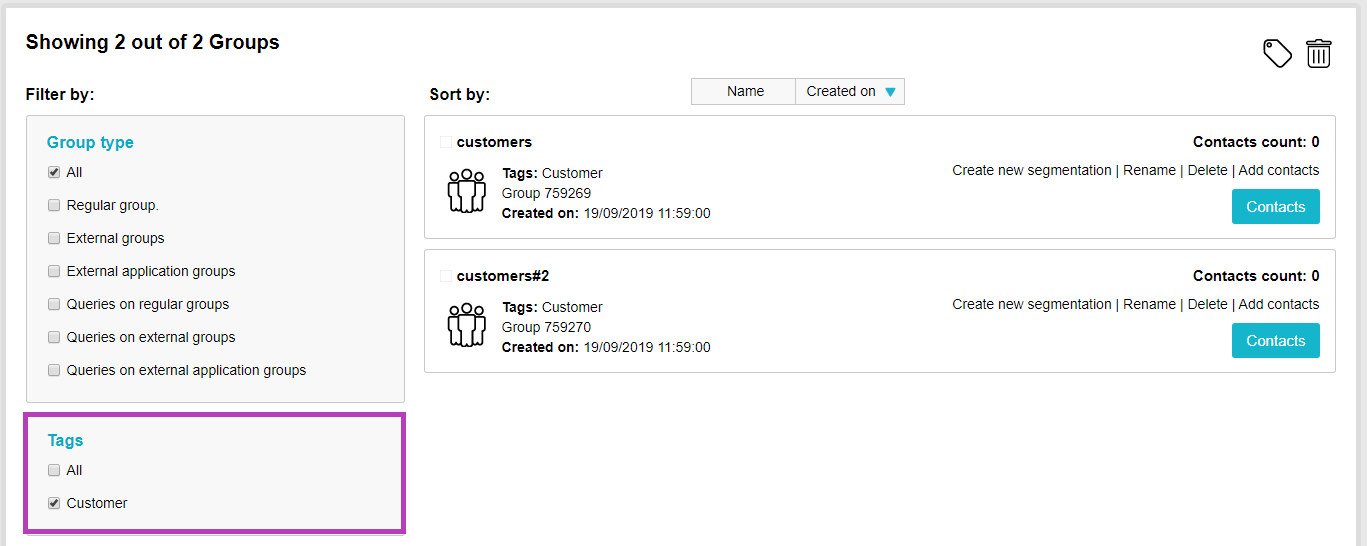
You can filter your contact list by tags. On the left side of the screen, in the “Filter by” menu, choose the name of the tag you want to filter by.

Now you can continue to design different and targeted campaigns for each of the tags you’ve created.
Here’s how to do that Create and edit email campaign guide | Create an SMS campaign guide
