Knowledge Base > Integration > Integration with Zapier – Syncing Contacts and Unsubscribes from Google Sheets and Google Contacts
With Zapir you can connect your inwise account to a wide range of applications and services: Web management systems (WordPress), cloud solutions ( Google Sheets), CRM systems ( Salesforce), lead systems ( Pipedrive), website building ( WIX), E-commerce systems ( Magento) for Facebook and many more …
In this guide we will demonstrate three integrations:
1.Sync contacts from Google Sheets to inwise.
2. Sync unsubscribes contacts from Google Sheets to inwise
3. Sync contacts from Google Contacts to inwise.
Here’s the translation and adaptation for your integration guide:
Step 1: Install the Latest Version
First, you need to install the latest version. To do this, go to the Zapier website using this link. From there, either create a new account or log in to your existing one.
Step 2: Connecting to Your inwise Account
You will connect to your inwise account using an API key.
Here’s where you can find it in inwise
- Log in to your inwise account.
- Navigate to Settings.
- Under API, locate and copy your API key.
Overview
Creating an automated process in Zapier is based on Triggers and Actions.
In other words, you define that a specific event in one system (Trigger) will cause one or more actions to be performed in another system (Actions).
For example, the trigger could be receiving a new lead in Google Sheets, and the action you want to perform is adding that lead as a contact in your inwise contact list.
Getting Started
The integration processes in Zapier are called “Zaps.” To create a new process, click on Create (1)+.

On the screen that opens, select the system that will serve as the trigger, and then choose the system where the action will take place.
Sync contacts from Google Sheets to inwise.
In the editing screen, click on Trigger and search for the relevant app that will serve as the trigger. In this example, choose “Google Sheets.”
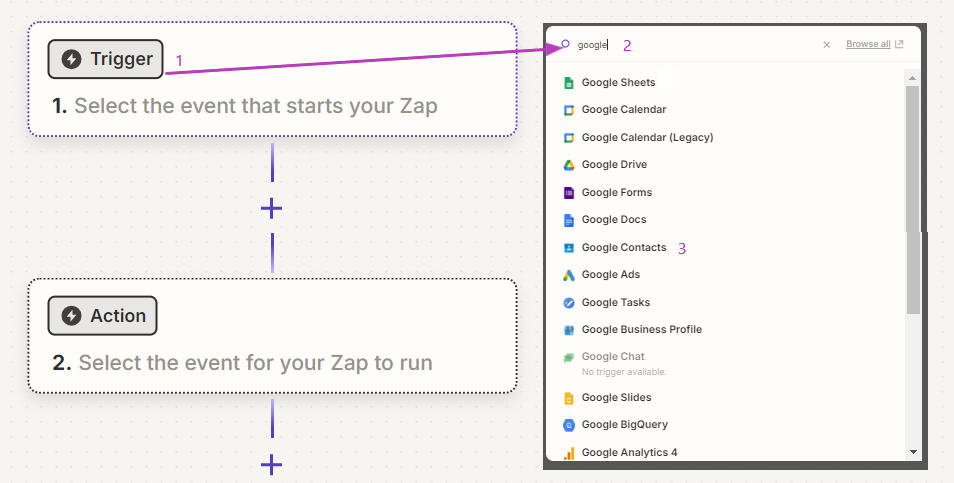
In this guide, we will define the trigger as Google Sheets, so the following steps are relevant to that.
In the “Trigger Event” field, select the appropriate trigger. In this case, we will focus on “New or Updated Contact.”
In the window that opens, choose the relevant Google account and allow access to it (3).
Finally, click on “Continue”.
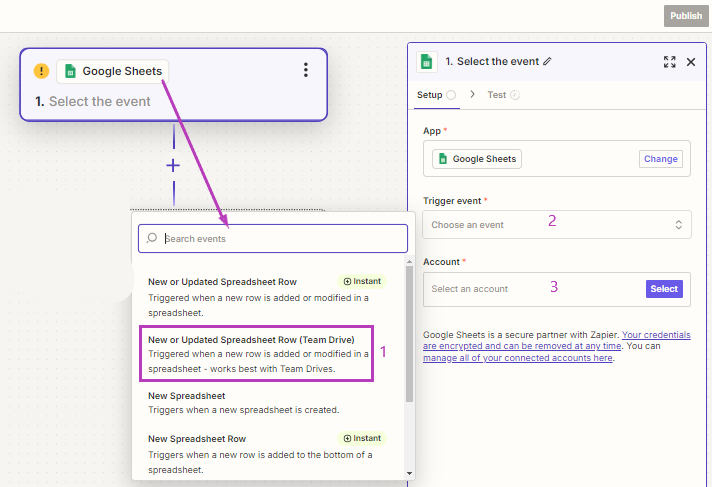
Now, select the relevant Google account and allow access to it (1).
Next, choose the relevant file (2), the specific sheet (3), and the column where any change will trigger the action (4).
Finally, click on “Continue”.
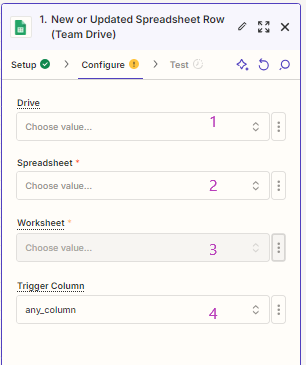
Ensure that there is at least one new contact in the file and perform a test by clicking the “Test trigger” button.
After receiving confirmation that the test was successful (Test Successful!), click the “Continue” button.
The first step is complete. Now, you need to integrate with the inwise application.
In the Action screen, select the system inwise-new.
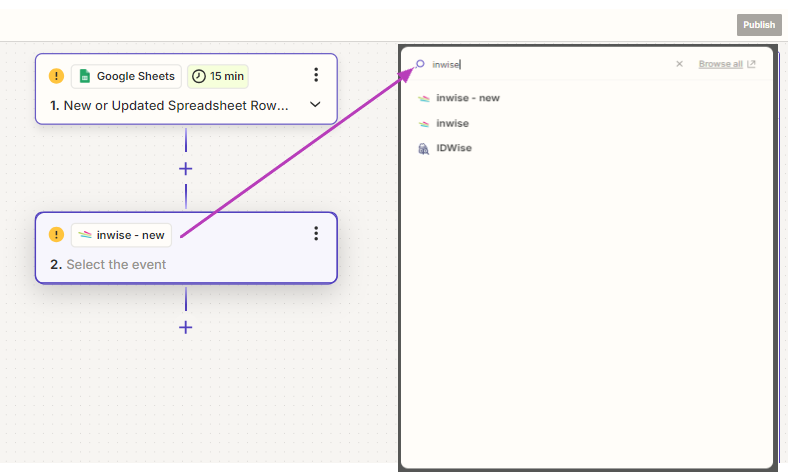
Select one of the desired actions; in this case, we will define “Add/Update Subscriber” (1).
Configure the relevant inwise account by updating the API KEY.
Then, click on “Continue”.
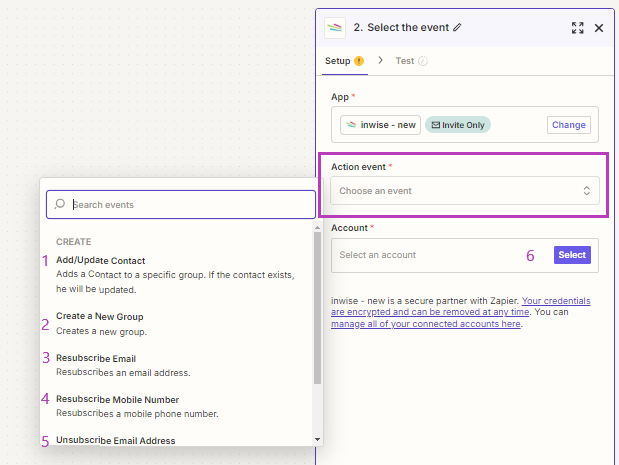
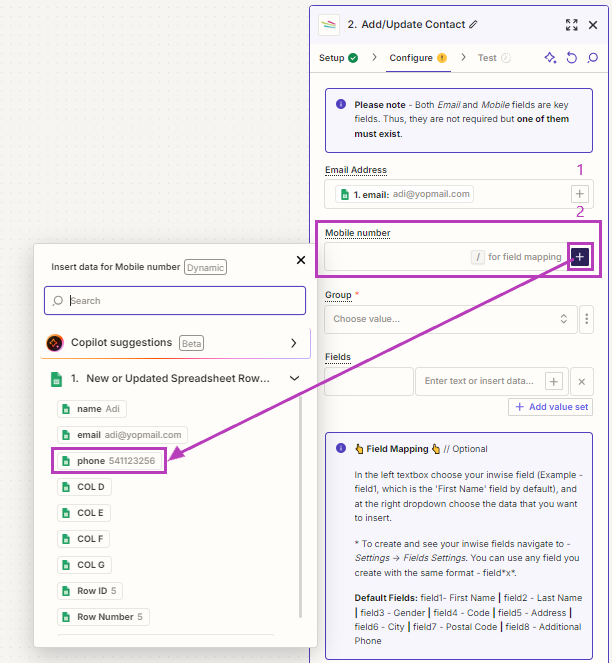
Now, you need to map the relevant fields so that the field in the Google Sheet updates the corresponding field in inwise.
*The key fields in inwise are Email and Phone, so you need to select one of these fields.
By clicking on the +, a list of columns from the Google Sheet will open.
In the example file, the Email field is defined in the column labeled email, and the Phone field is defined in the column labeled Phone.
*To send SMS messages through the inwise system, ensure that the format of the mobile numbers includes the international dialing code. For Israel, this is 972. If this is not the format updated on your site’s form, you will need to convert the format. To do this, add another action as detailed in the following guide.
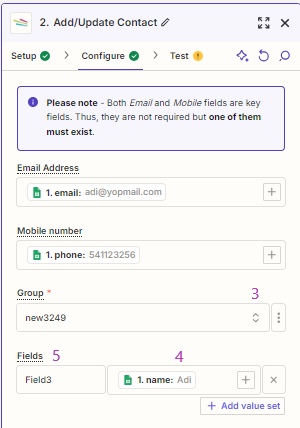
In the Group field (3), select the group number from your inwise account to which the contacts will be synced.
You can also define additional fields from the file to sync with the existing fields in your inwise account.
In field (4) – choose the column from the file.
In field (5) – enter the field number as it appears in inwise (for example: field1).
For guidance on how to find the field number in inwise.
Finally, click on “Test”, and if everything is in order, you can publish by clicking on “Publish”.
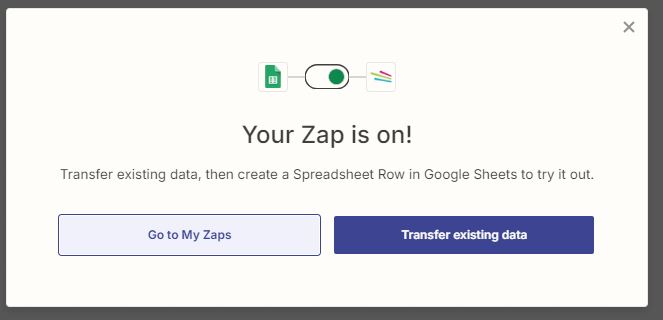
The process of creating a ZAP is now complete, and you can see it in the main menu of Zapier (dashboard).
Sync Unsubscribes contacts from Google Sheets to inwise
Follow the same steps as in Sync Contacts.
At the second step, on the action screen – select the inwise system, and choose the action (5) of “Unsubscribe Email Address.”

and continue synchronizing contacts as above.
Sync contacts from Google Contacts to inwise.
Follow the same steps as in Sync Contacts.
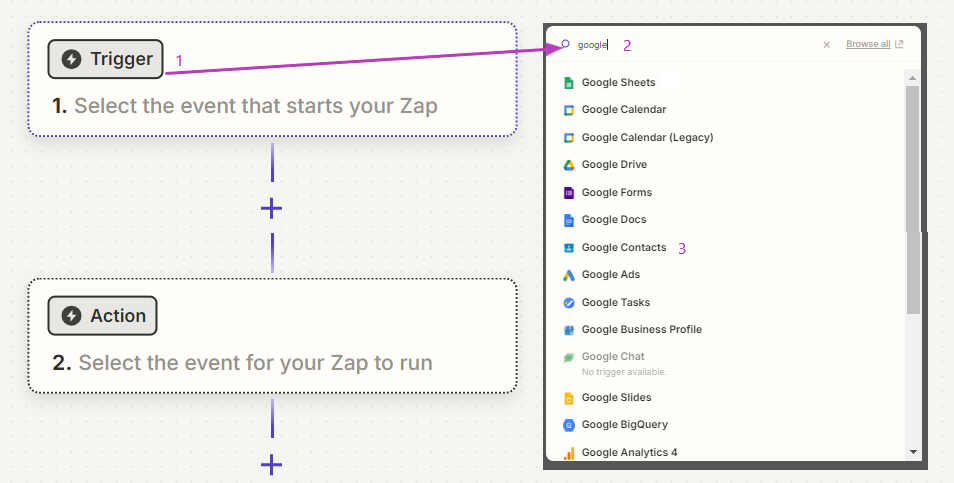
At the first step, Choose your trigger app – “Google contacts” (1).
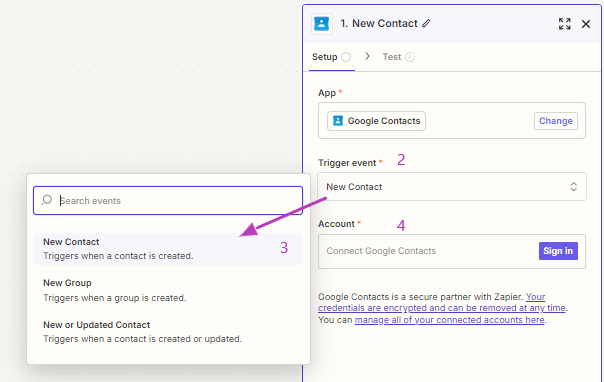
Select the trigger “Trigger Event” (2).
In the window that opens, in the “Trigger Event” field (2), select the relevant trigger. In this case, we will focus on “New Contact” (3).
Next, select the relevant Google account and allow access to it (4).
Choose the desired contact group or leave the default option of all contacts, then click on “Continue”.
The continuation is the same as detailed above for syncing contacts from Google Sheets.
