
Knowledge Base > Salesforce > Send Email through Salesforce Flow
Setting the trigger
First, define in the Flow builder which event or trigger would lead to the sending of an Email . Such as when a contact is registered, a meeting is rescheduled for 3 hours, a purchase is made, a donation is received, a delivery has been sent, etc’.
In order to define the action “Action”, you have to first create the Formula, as follows:
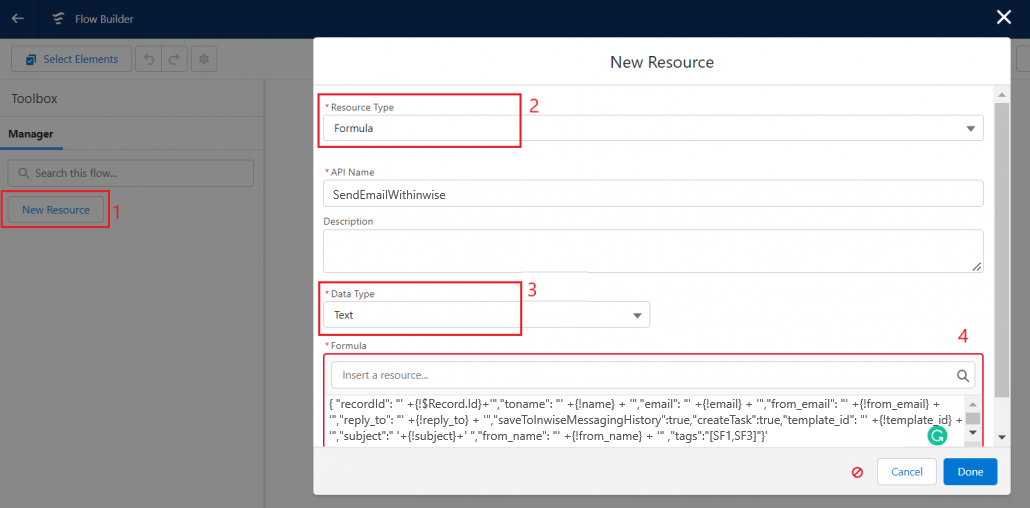
- Click on the “new resource” button
- In the panel that opens, in the “Resource Type” field choose “Formula”.
- In the “Data type” field choose “Text”
- In the field “Formula” field, enter the code (you can add more parameters to this code):
– Example 1 with minimum values:
‘{“recordId”: “‘ +{!$Record.Id}+'”, “template_id”: “‘ +{!template_id} + ‘”,”email”: “‘ +{!email} + ‘”,”
– Example 2:
‘{ “recordId”: “‘ +{!$Record.Id}+'”,”toname”: “‘ +{!name} + ‘”,”email”: “‘ +{!email} + ‘”,”from_email”: “‘ +{!from_email} + ‘”,”reply_to”: “‘ +{!reply_to} + ‘”,”
**In the case that you receive an error in the formula, please contact us so that we can update the code for you.
Parameters values for the formula
- recordId value – Optional. Identify your contact/lead ID. You should use this if you want to save history.
- Email – Holds the text that you want to send . {!$Record.FirstName} is an example of how to concatenate a parameter. Text can be entered here directly in the formula or it can be taken from a parameter field.
To add a line break (ENTER) – use n. - Tamplate_id – The template id exists in the account
- Subject – Optional. The message subject.
- from_email – Optional. The sender email address. You can leave this field empty to use the default. The value must be a valid email address from your inwise settings.
- reply_to – Optional. reply-to address. When not set, the ‘from_email’ is used.
- toname – Optional. The recipient’s display name.
- create Task – Optional. If true, a task will be created in the contact/lead object.
- saveToInwiseHistory – Optional. “true” will add a row to the contact/lead’s inwise messaging history object (true must be lowercase).
In order to use this feature, it is necessary to activate the messaging history feature in the add-on settings of inwise – You can find more information in the following guide – Settings – adding inwise modules – fast SMS.
The new record will be created in the contact/lead layout in the inwise messaging history section

Meaning of status:
| Status | Value | Remark |
| The send was valid | Sent | |
| invalid email | Invalid | The email is invalid |
| The email is defined as bounced in inwise | rejected | bounced |
| The email is defined as unsubscribe in inwise | rejected | Unable to send Email, for more detail check message history |
| When the email from is not a valid string according to inwise account | *There should be a row in the error log, you can also see it in the inwise API LOGS page.
|
Setting the Action
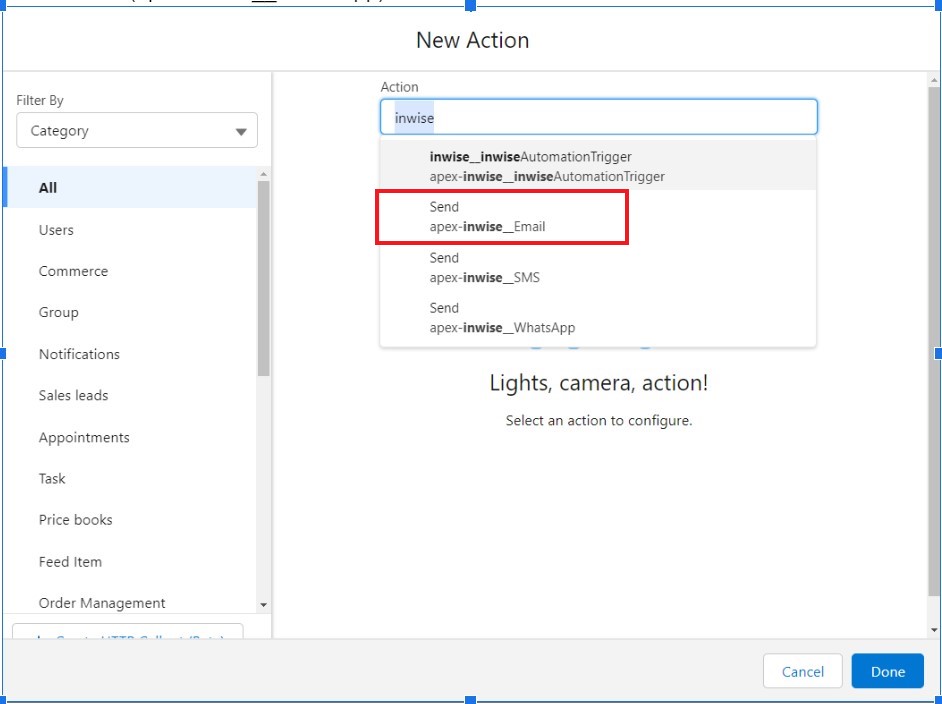
In the flow builder screen, click on the plus icon (+).
Search “inwise” and choose the action: “Send (apex-inwise__SMS)”
(If you don’t have these options you might not have the latest version of inwise addon version. To receive an updated version, contact our support team).
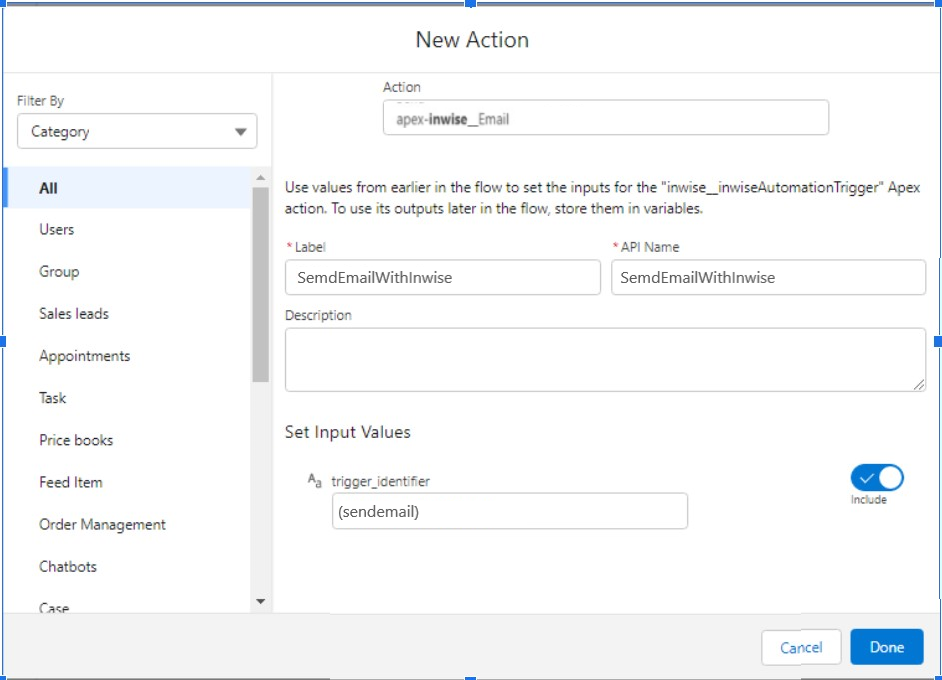
Mark “Include” in the “Set Input Values” section, then select the formula you previously created.
Choose the formula that you previously created.
That’s it! You have finished setting up, now activate your flow and send it