
Knowledge Base > Campaign > On site
“Goals” is a feature that allows you to collect information about the contact list that visits your site, following the campaign that was sent and measure the effectiveness of that campaign.
By embedding the tracking code on relevant pages of your site, you can track visitor behavior and monitor goals you define. For example, to examine the purchase process a customer goes through, you need to plant the code along all the pages they go through during the purchase process. But to check who actually made a purchase, it’s enough to embed the tracking code on the final page of purchase confirmation.
Step 1 – Copy the tracking code (pixel) and embed it on your site.
Copy inwise’s tracking code (pixel) and embed it on the first page to which the email campaign is directed.
We’ve written a guide explaining where the inwise tracking code appears and how to embed it on different sites built on different platforms.
* Note: Your site manager should be able to assist you with planting the code on your website
Step 2 – adding Click tracking
Email Campaign
When you have finished editing the email campaign, in the “Campaign settings” screen, under sending settings, check the field “Add On Site To Campaign”.

SMS campaign
While editing SMS campaign, check the “Add On Site To Campaign” option.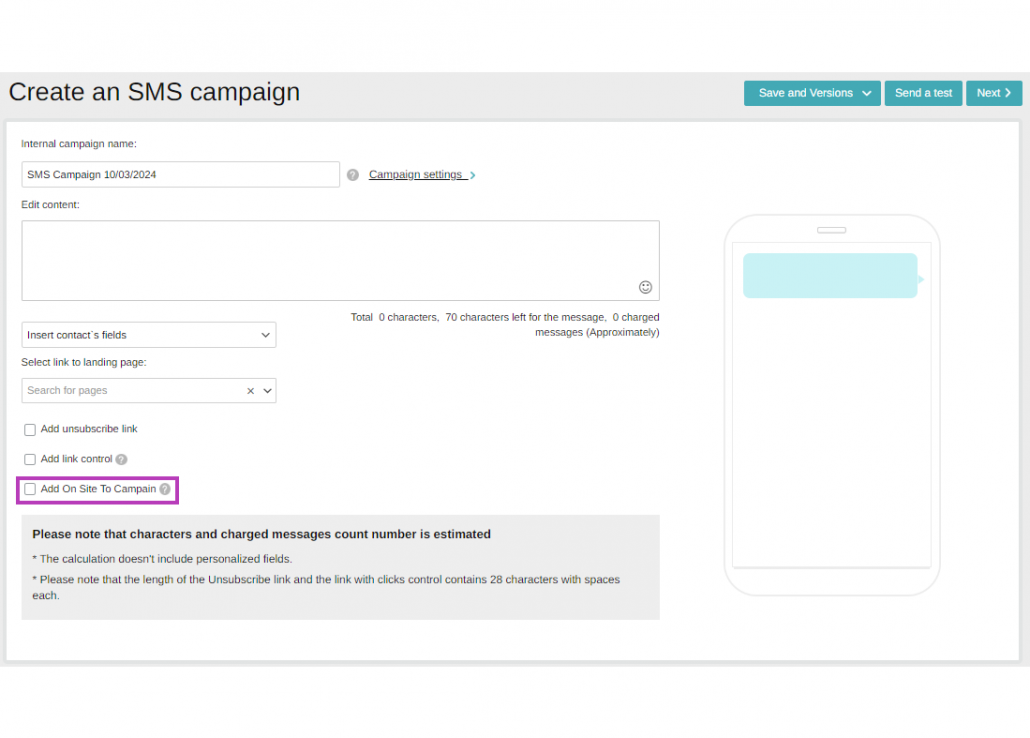
Step 3 – Viewing Goal Statistics.
Once the campaign has been sent, you can view its details and the number of contacts who reached its goal pages.
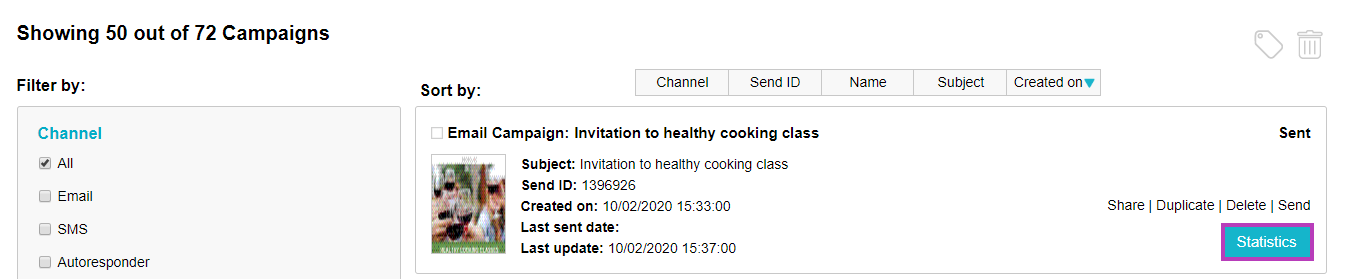
To do this, click on the “Campaigns” tab in the left menu and then click the “Statistics” button in the relevant campaign bar.
This takes you to the campaign statistics. On this screen, you can scroll down a little bit, below the “Performance funnel”, to reach the goals table:

Here are the detailed components of the Goals table:
“Goals ID” – This is an internal numbering by the system for any purpose for which it is defined
“Goal Name” – You can change the name of the goal to make it easy for you to identify
“How many entries” – Total entrances to pages you have set as goals. For example, one contact person who entered three times per page will count as 3.
“Unique Hits” – The number of contacts that entered the goals pages. Each contact is counted only once, even if she/he enters the same page several times (unique by contact).
“Address” – URL of pages you have set as goals.
“Creating Date”– Date the goals pages were created.
“Last Update” – The last date the goals statistics table was changed (such as changing the name of a goal).
By clicking on each goal, you will reach the “contact activity” screen. These actions are associated only with this campaign and solely for the purposes that you defined. You can view the contact information that entered the goals page, their email address, the dates they entered the page, and personal data (if pre-entered).

What now?
Once you’ve examined your contacts’ behavior, you can divide them into groups and send each one a campaign with different and tailored content