
Knowledge Base > Account Settings > Adding a Tracking Code (Pixel)
Implementation of the code is a one-time action and has no effect on the site’s performance.
The code is uniform and matches all the platforms on which the sites are based, but the way the code is added varies between site and site.
We’ve prepared step-by-step guides to help you add inwise tracking code to your site.
Copy inwise tracking code (pixel):
The tracking code can be accessed from two places:
- At the last screen of the pop-up creation process interference will appear inwise tracking code.
- Click on the “Little Man” icon at the top of the screen (1), then click on “create a tracking code”.
Copy the code and paste it between the </head> tags in your site.
HTML
Paste the code above the </head> tag in any HTML page(s) you wish to track.
Google Tag Manager
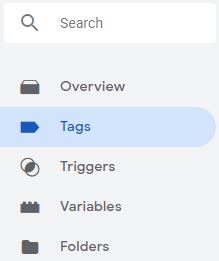
- Go to the Google Tag Manager. In the menu on the left, click Tags.
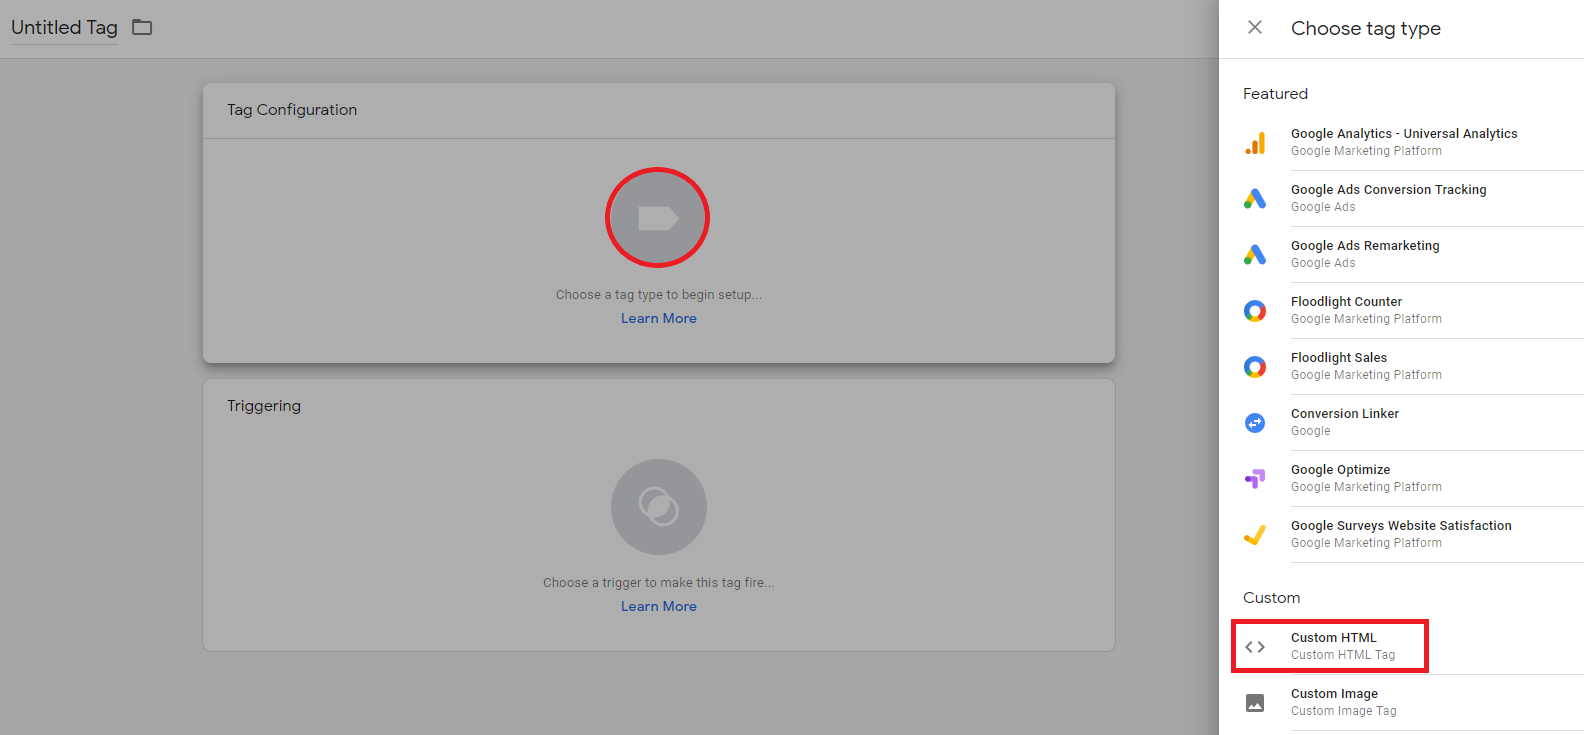
- Click New.

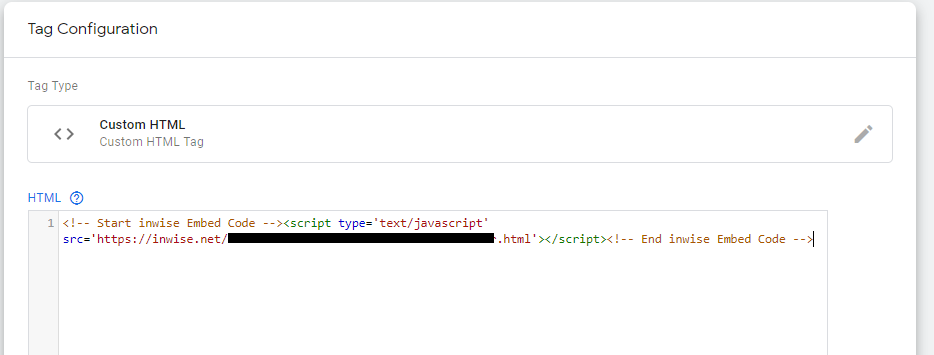
- Click on the “Tag configuration” box. In the “Choose tag type” list select “Custom HTML”.
- Paste inwise’s tracking code in the HTML box that appears below.
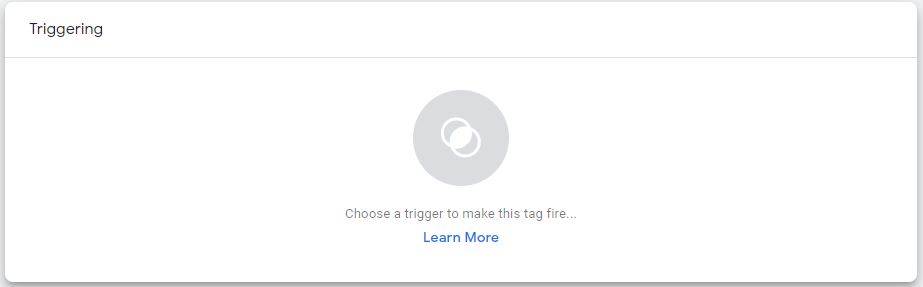
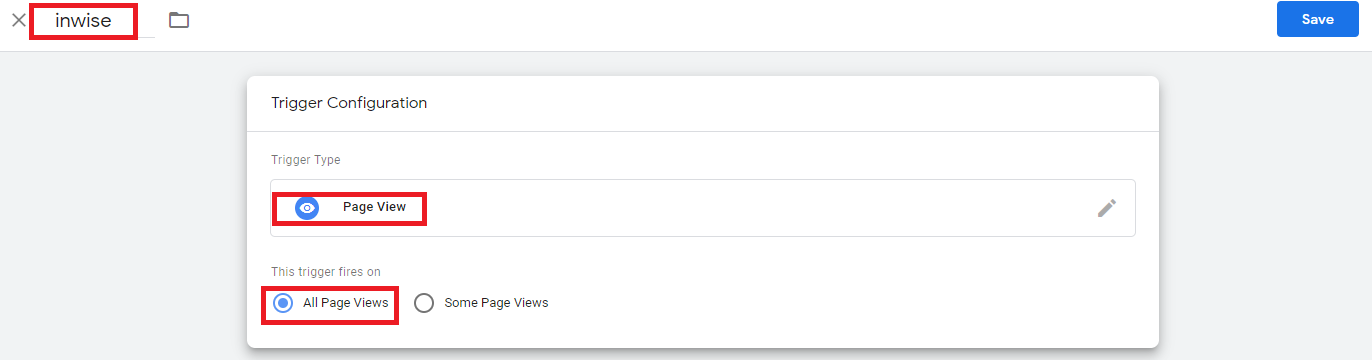
- Click the “Triggering” box. Choose “Page View”.
- In the upper left corner, give a meaningful name to this new tag, such as ″inwise″. Select “All Pages” to enable inwise to track your entire site.
- In the upper right corner of the overview click “Submit” and click “Publish”.
Wordpress
- In your WordPress admin console, click “Add new”.
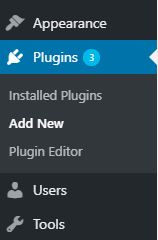
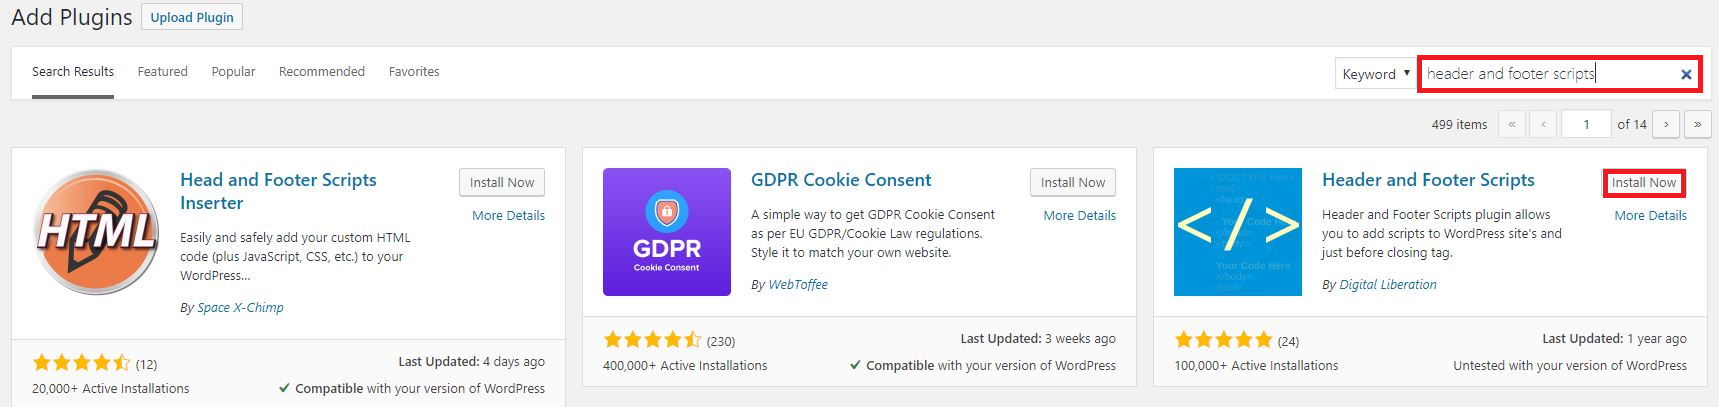
- In the search plugins box, search for ″Header and footer scripts″, and click “Install Now”.
- Once the button text has changed to “Activate, click it again to activate the plugin.
- After the plugin is added, add inwise’s tracking code to all pages, by going to Settings, choose “Header and footer scripts. Paste inwise tracking code in the “Scripts in Header” box.
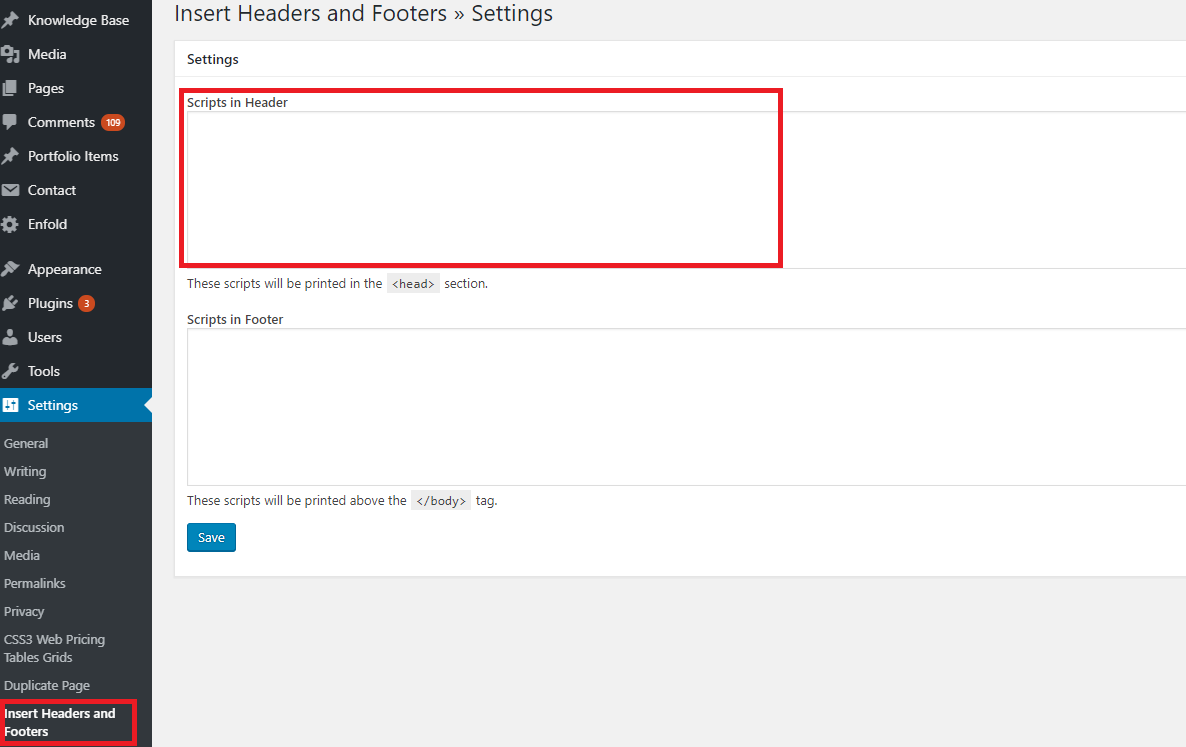
- Click “Save Settings”.
WIX
- On the sidebar, choose “Settings”.
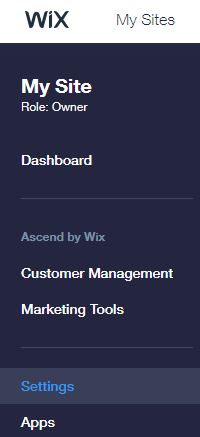
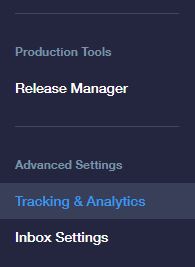
- Select “Tracking & Analytics”.
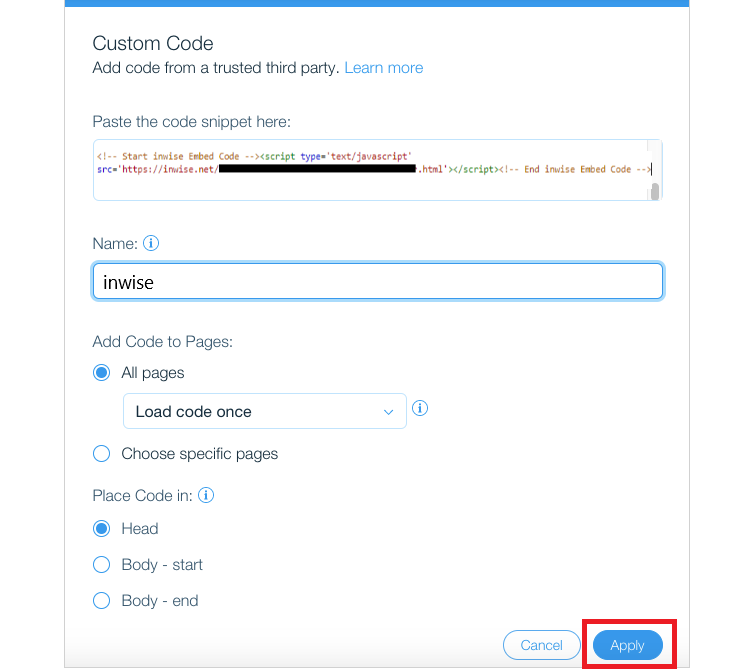
- Click on the “New Tool” button and select the “Custom” option.

- Paste inwise’s tracking code in the text box, name it “inwise″ and make sure “All pages” and “Head options” are selected.
- Finally click “Apply”.
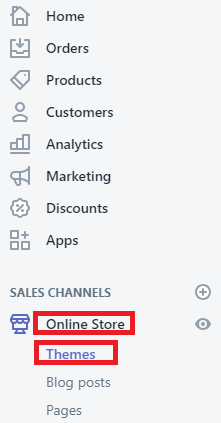
Shopify
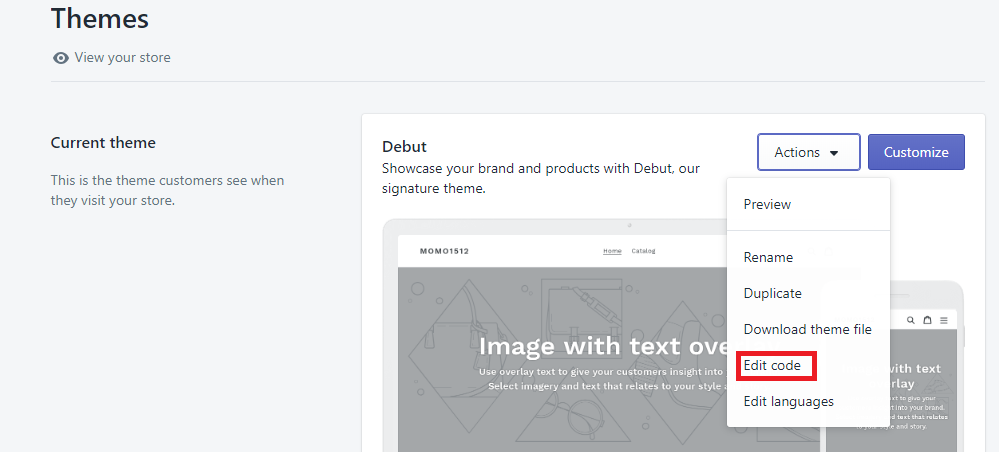
- Go to Online Store -> Themes.
- Click on “Action” and choose “Edit code”.
- On the sidebar click “Layout”, and choose “theme.liquid”.
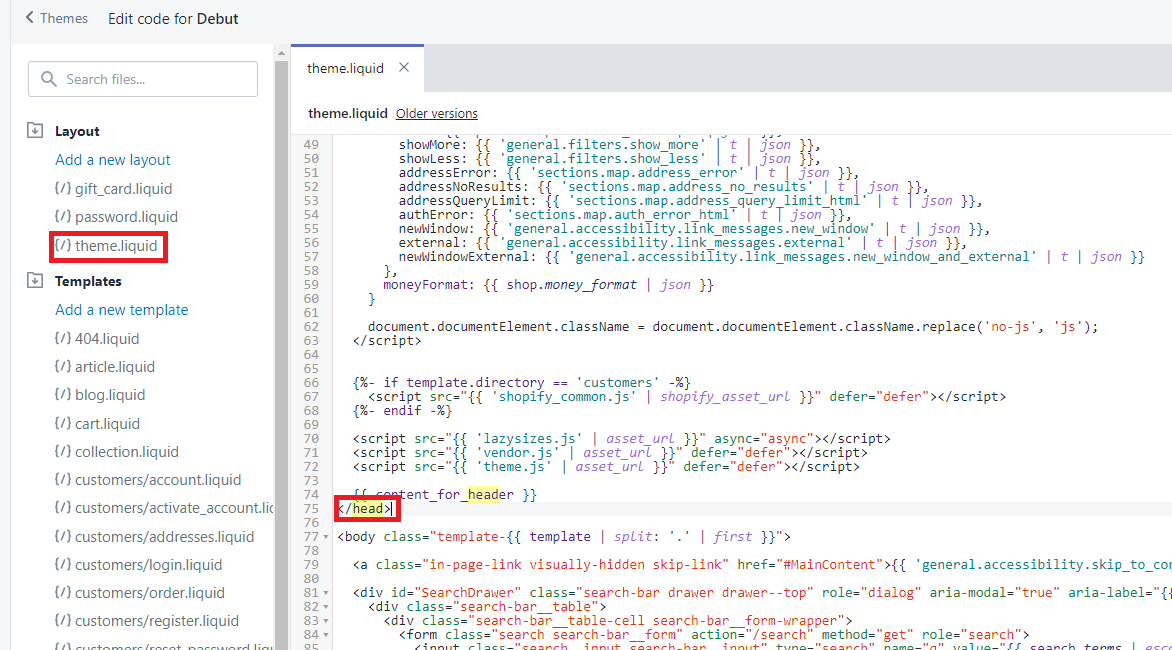
- Paste inwise’s tracking code just above the closing head element (</head>).
- Finally click Save.
after adding the tracking code to your site, inwise starts collecting every button click and form submission in the analytics area. This will help you analyze patterns in your site visitors’ behavior and gain insights to help you increase conversions. More information in this guide.