Knowledge Base > Marketing automation > Get a notification for a form registration
Creating automation
On the main login screen, in the main menu bar on the left side of the screen, click on the “Automations” tab (1).
On the right side of the screen a window will open “Common Actions”, click on “Create Automation” (2).

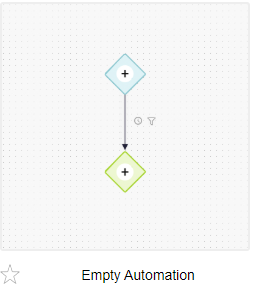
Select “Empty Automation” Template.
Every automation consists of a trigger and an action.
Trigger (blue) – is the factor that activates the automation – in this case, “Filling out the signup form”
Action (green) – The action that will be performed after the trigger has occurred e.g. “Send an email / SMS to the manager”.
Set the trigger
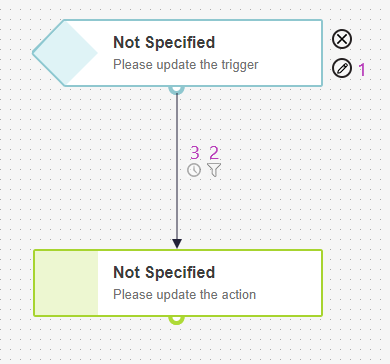
To set and edit the properties of the trigger, click on the pencil icon (1).
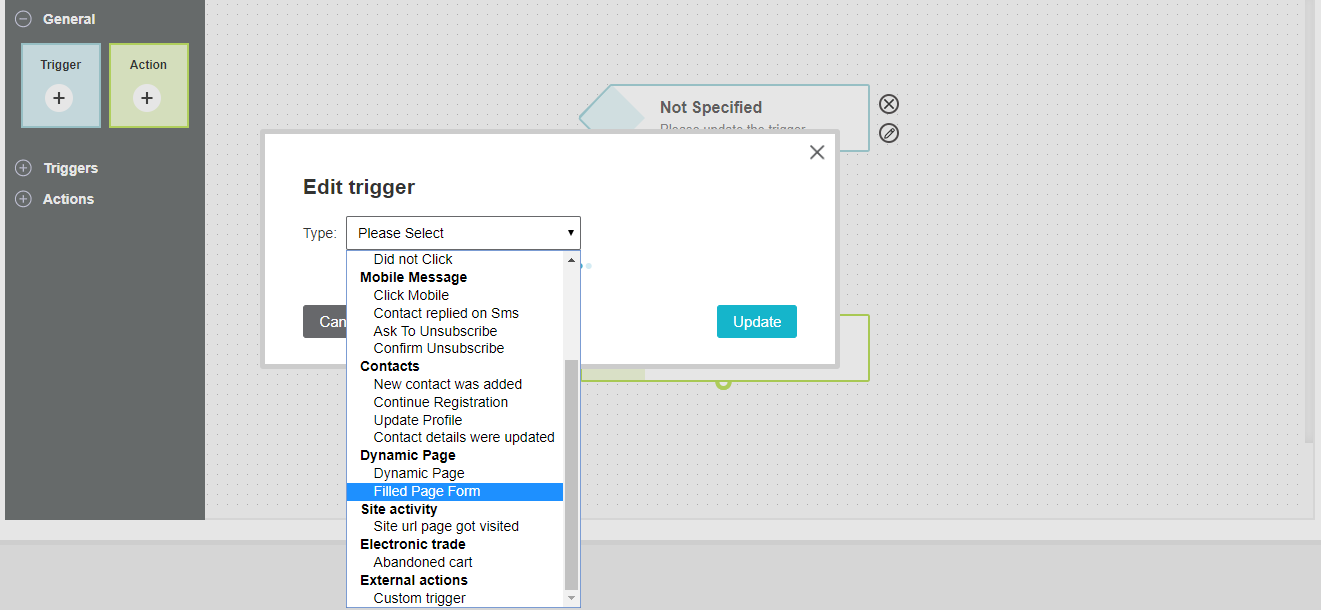
In the “Edit trigger” panel, in the “Type” field, scroll down and select “Filled Page Form (under the “Dynamic Page”category ).
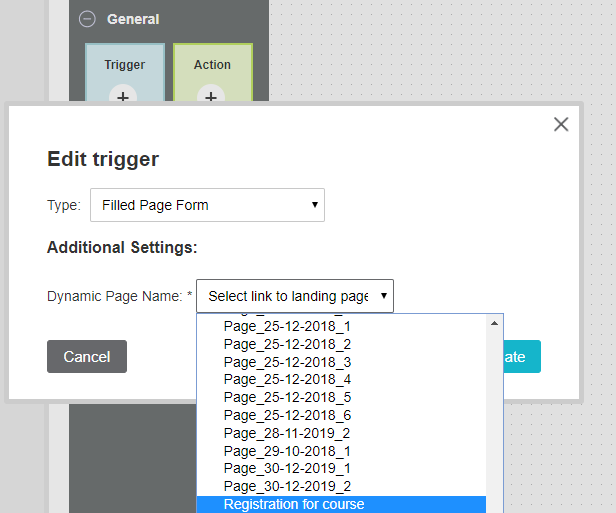
In the “Dynamic Page Name” field, select the landing page where the relevant form appears.
Finally, click “Update”.
Define the action
Click on the pencil icon next to the action.
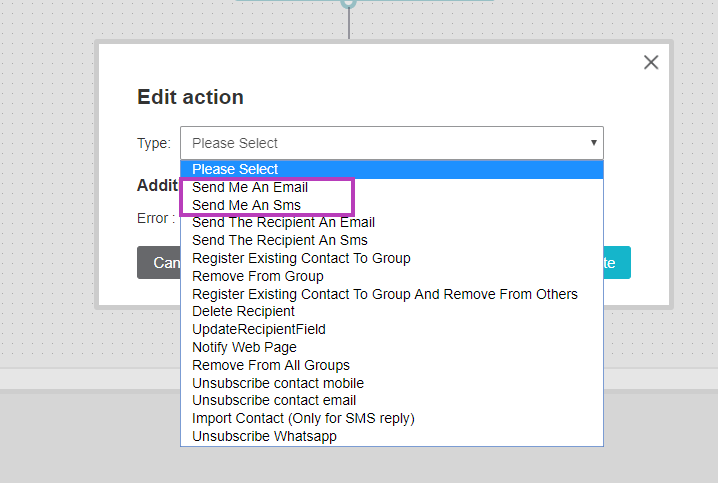
In the “Edit action” panel, in the “Type” field, select “Send me an Email “or” Send me an Sms”.
Send an email notification
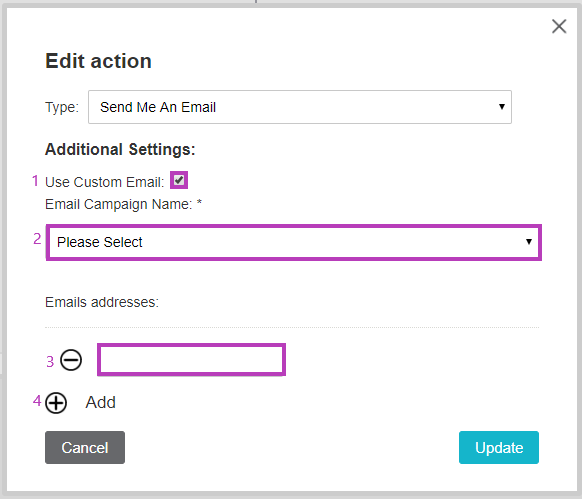
If you prefer to get a campaign that you created by yourself, in the additional settings, select the “Use custom email” field (1).
In the example, an email campaign “Notice of filling out a signup form for an investor conference”, was prepared but not sent, and is in draft mode, select this campaign (2) *1.
Enter the email address to which the notification will be sent (3).
Click on the “plus” icon to open another field, where you can enter another email address (4).
Finally, click the Update button.
* You can find an explanation of creating an email campaign in the guide “create and edit an email campaign”.
** In order to add information that the contact filled out in the signup form to the notification email, at the stage of designing and editing the campaign, you should add the following tags to your notification email:
- Contact information fields:
Email Address: # ContactEmail #
Phone Number: # ContactMobileNumber #
Information from field 1 as you defined it: 1 # ContactField1 #
Information from field 2 as you defined it: 1 # ContactField2 #
– The personal field number depends on the definition of the fields in your account. Information on this is found in the guide for creating and updating contact information fields. - Landing page information fields / registration form / pop-up:
Landing Page Name / Registration Form / Popup: # PageName #
Page / Form Address: # PagePath #
Information from field 1 in the form – 1 # FormField1 #
Information from field 2 in the form – 1 # FormField2 #
It is recommended that the notification name is set the same as the campaign name.
Finally, click on the save button in the top menu of the screen and exit the campaign, which can be kept in draft mode – there is no need to continue sending the campaign.
Send a notification in an SMS message
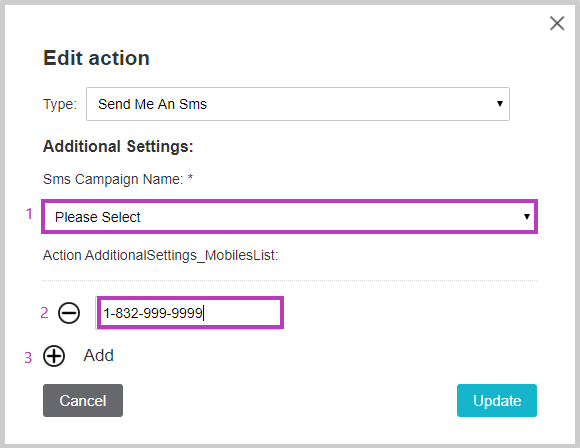
In the example, an SMS campaign “notification for filling out a signup form for an investor conference” was prepared but not sent, and is in draft mode. Select this campaign (1) *.
Enter the phone number to which the notification will be sent (2), in the following format: 917-660-3912
Click on the “plus” icon will open another field, where you can enter another phone number (3).
Finally, click the Update button.
* An explanation of creating an SMS campaign can be read in this guide.
* *Explanation of adding tags with information from personal fields of contacts – can be read above.
Next, click on the save button in the top menu of the screen and exit the campaign. In order to keep it in draft mode – don’t continue sending the campaign.
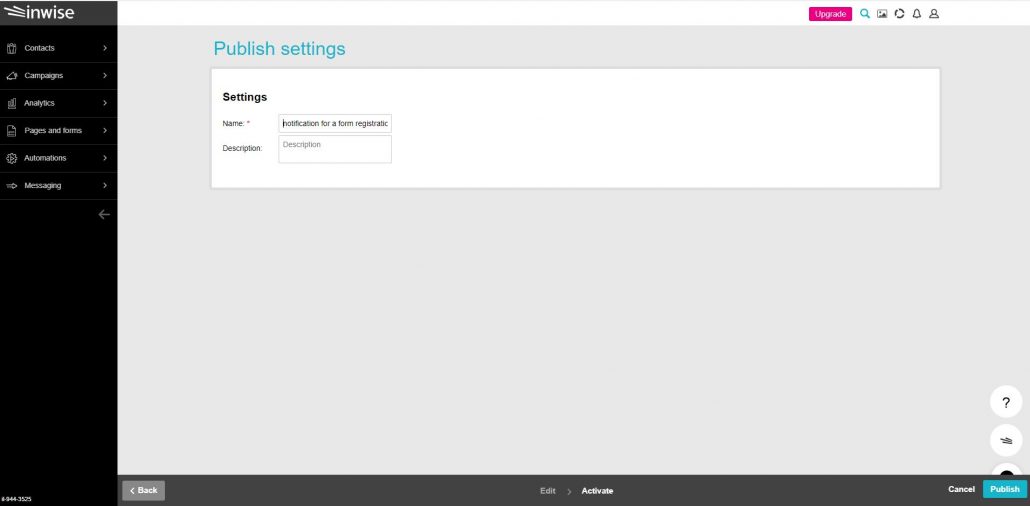
Finally, in the “Publish setting” screen, update the automation name and click on the “Publish” button, at the bottom right corner of the screen.
What is the next step?
Building and designing an email campaign and running it through marketing automation.
How do you do that? See A guide to building an email campaign.
