Knowledge Base > Contacts > Managing and Segmenting Groups and Contacts
In many cases, it would be ineffective to send the same campaign to all of the contacts in your account.
Correctly segmenting your contacts (e.g by address or gender) ensures that the campaigns you send will be targeted and effective. It is, therefore, important to keep contact lists organized by various features that are important to you.
This tutorial will explain how to use contact lists in the inwise system.
The initial unit – contact
The basic unit of all mail account is the contacts or “recipient”.
Each contact represents a real person who has subscribed to be on your mailing list. 
Fields – contact information
Fields contain each contact’s features such as age, gender, city of residence and so on. inwise is a multi-channel system, with two key fields of an email address and mobile number. One of them must be included with each contact. You can add any other custom field relevant to you.
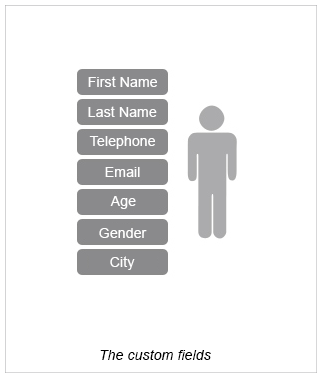
For example, you might decide to send different campaigns to different contacts from different cities.
As part of this, you can group data related to the city of your contacts into regions, and create a custom field called “region” with values such as “North”, “South”, “Central”, etc.
In the example below, each contact information contains fields used to create a personal reference, using the first name as the identifier. You can then create groups based on similar properties, such as grouping by region or town.
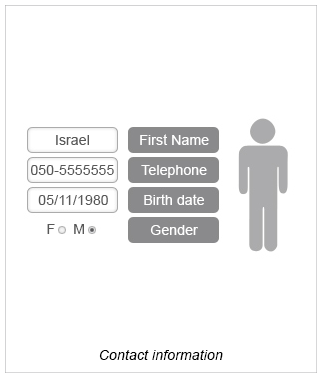
Types of field
There are several types of fields in the system that intended for different types of information
1. Text fields – intended for an email address, name, ect.
2. Numerical fields – intended for numbers only, such as phone number
3. Date fields – contain only dates, such as date of birth or date of registration
Field can be open or closed:
An open field allows free typing of text (such as address, first name, etc.).
A closed field contains pre-set values (e.g. gender which contains two values – male or female).
The easiest way to manage contacts is to divide them into groups
Groups
The easiest way to manage contacts is to divide them into groups
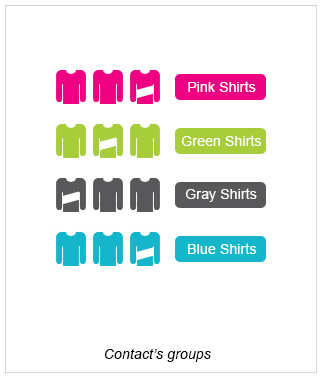
You can group contacts according to your needs. There is no limitation on the number of groups that can be created or the number of contacts that can be included in each group.
In the example above, we divided the contacts by the colour of their shirt and created four groups. We can then decide to send the campaign to all groups in the system or just one, two or more.
Segmentation
Each segmentation provides an additional classification for your contact list.
Sometimes you may need to ”pull out” certain people with similar features that are in different groups. You can use segmentation for this purpose. Segmentation allows you to classify contacts with similar features although they might be listed in different groups in the system.
In our example above, the account owner wanted to identify all the persons with a white stripe on their shirt. In all four existing groups, there are contacts with white stripes on their shirts.
The segmentation describes the relevant contacts from all four groups using a separate feature – “with white stripe”, without affecting their grouping.
You can create countless segmentations without damaging the original groups.
Learn more about segmentation in this guide.
Tags
A tag allows you to create sub-groups. It can provide additional organization by using a specific feature that is similar throughout your groups of contacts.
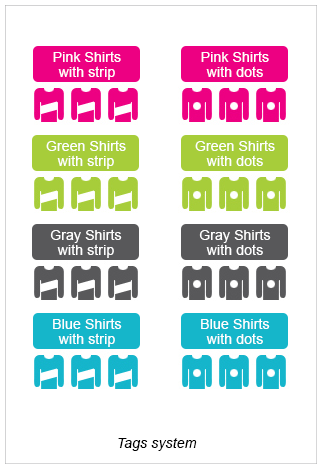
Let’s say that in addition to the stripe (as shown in the segmentation above), there are other decorations on the shirts.
This means that contacts can have the same shirt colour with different decorations – stripes or dots.
You can choose to further group your contacts (already grouped by e colour of the shirt) by the decoration on it. This results in several sub-groups such as – pink shirts with dots, pink shirts with stripes, green shirts with dots, green shirts with stripes, and so on.
Tags create a sub-grouping around one specific feature, e.g. decoration on the shirt.
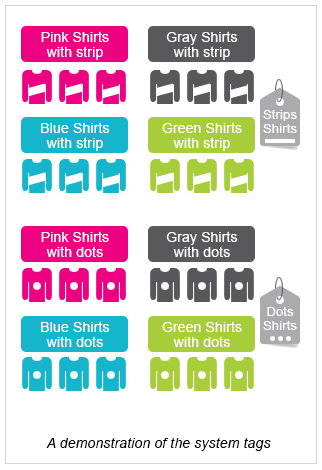
There is no limitation to the number of tags each group can get – one group can appear under several tags simultaneously
Learn more about creating tags in this guide.
