Knowledge Base > Salesforce > Settings – automatic lead sync & unsubscribe
Setting synchronization of the unsubscribed
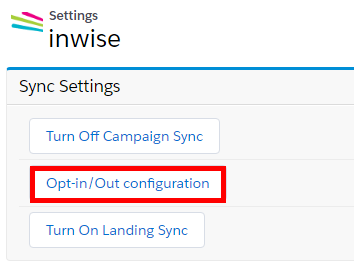
1. On the main screen of the inwise app for Salesforce, click the “Settings” button.

2. Click on ‘Opt-in / Out configuration’:
3. Here you can select the unsubscribe settings for email and SMS, and define the field in Salesforce that will be marked if the contact/lead remove himself from the contact list:
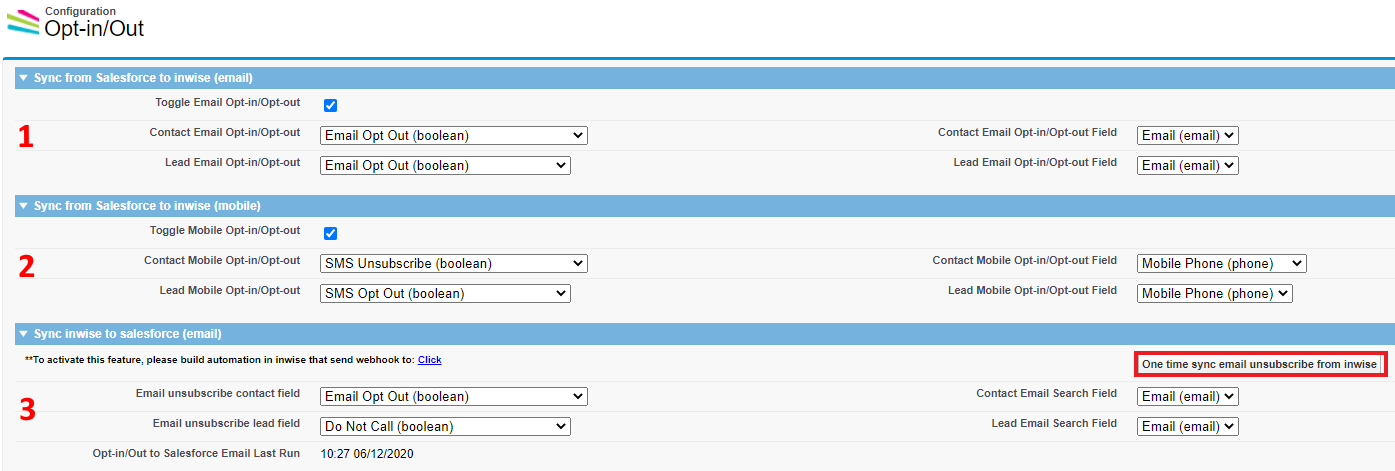
- Toggle Email Opt-in / Opt-out – Email – By checking this setting (checkbox) and setting the relevant fields, each time these fields are marked on the contact/lead screen (manually) – the email will automatically enter the unsubscribe list in the inwise account.
- Toggle Email Opt-in / Opt-out – Mobile – By checking this setting (checkbox) and setting the relevant fields, each time these fields are marked on the contact/lead screen (manually) – the phone number will enter the unsubscribe list in the inwise account automatically.
- Sync inwise to Salesforce – Email – By checking this setting, the inwise system will know which field to update for a contact/lead if he has unsubscribed from mailing.
- Sync inwise to Salesforce – Mobile – In this setting, inwise will know which field to update for a contact/lead if he has unsubscribed from SMS.
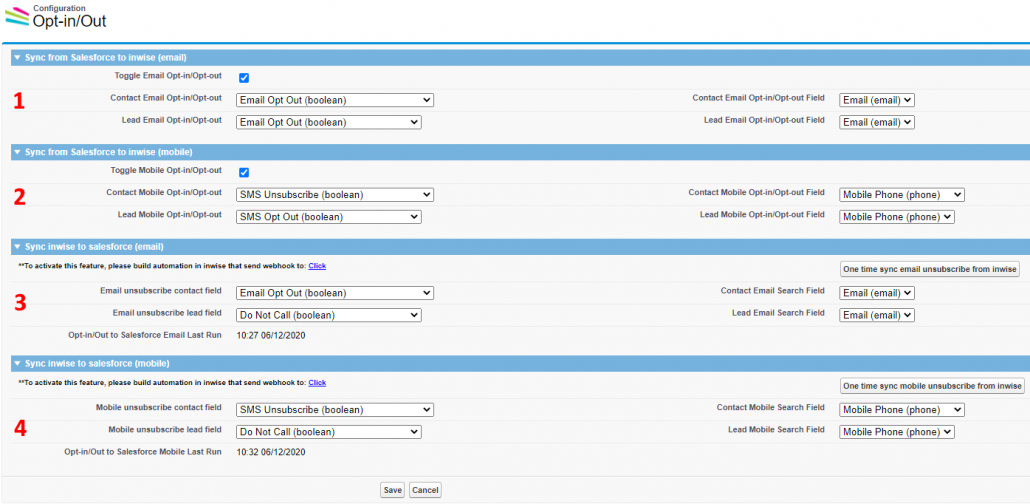
4. After you have completed the settings, click “Save”.
5. Log in to your inwise account, then enter the following link: https://app.inwise.com/Oauth.aspx
6. Click on the link – login to salesforce.

A Salesforce screen asking for approval will open – click on Allow.

7. Once access is allowed, you will see the following message in the inwise system confirming that the connection has been made – ‘Logged in successfully’.

8. In the inwise system, in the menu on the right, navigate to ‘Automations’ -> click on ‘Create Automation’ and select the ‘Empty Automation’ template.
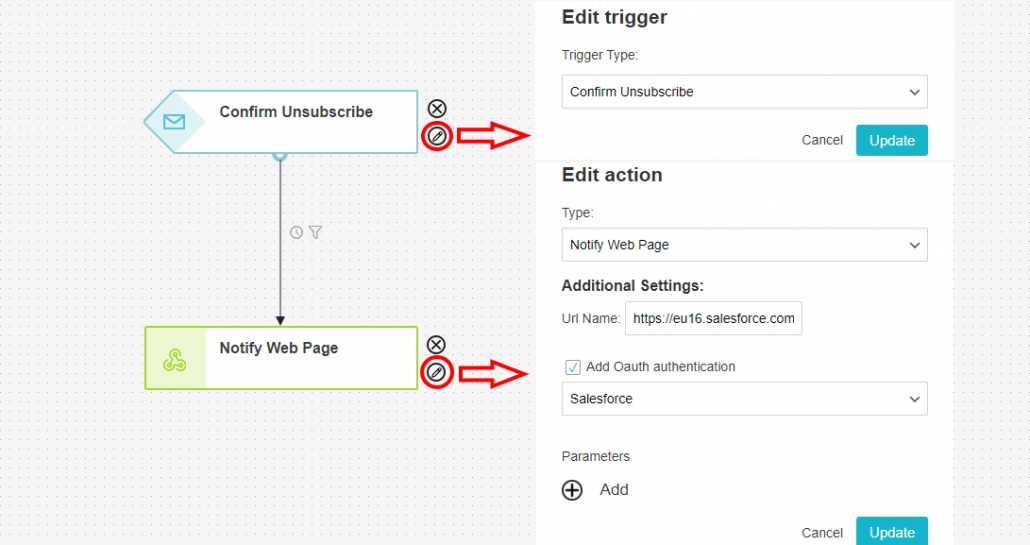
9. In order to set that each time someone unsubscribes the information will be sent to Salesforce, select the Trigger – ‘Confirm Unsubscribe’ under the Email category.
*In order to set this trigger for SMS, you have to add another trigger – ‘Confirm Unsubscribe’ under the SMS category.
Select the Action – ‘Notify Web Page’.
In the field: “URL name”, you need to enter a private link of your Salesforce account.
You can find that link as follow:
– On the “Configuration Opt in/out” screen (stage 3).
– in section 3: “Sync inwise to Salesforce”, click on “click”. “To activate this feature, please build automation in inwise that send webhook to: Click)”.
– Copy the URL address from the screen that opens (don’t be alarmed by the Errors that appear). https://XXX.salesforce.com/services/apexrest/inwise/inwiseUnsubscribe
– Paste that link in the field: “URL name”.

In the action settings, check the box- ‘Add Oauth Authentication’- and select ‘Salesforce’ from the drop-down list.
*If the ‘Salesforce’ option does not appear under ‘Add Oauth Authentication’, that means that the authentication between inwise and Salesforce was not properly connected (Section 5).
10. Click on Continue, enter a name for the automation, and finish running it.
We are done! From now on, when a contact unsubscribes – the selected unsubscribe field will also be marked in Salesforce.
Settings: Automatic lead sync from landing pages to Salesforce
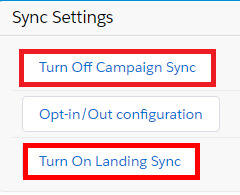
To enable auto-sync so that the leads will automatically be drawn from the inwise landing pages to Salesforce every hour, go to ‘Settings’ in the inwise app.
Click on the toggle button and switch to: ‘Turn On Landing Sync’.
To enable auto-sync so that the analytics of the campaign will be accessible in Salesforce, go to “Settings” in the inwise app.
Click on the toggle button and switch to: “Turn off Campaign Sync”.
When you finish setting up the configuration, you can still run the synchronization manually if you wish, by clicking ‘Execute’. You can edit the synchronization by clicking ‘Edit’.

Synchronize unsubscribes retroactively
If it is necessary to synchronize unsubscribes retroactively one year back, because synchronization of unsubscribes was not active and mailings were sent from inwise.
In the “Settings” screen, set up the date from which you want to sync the unsubscribes.
Classic interference
In “Custom Settings” click on “Edit”.
Lightning interference
In “Advanced Settings” select “manager” to “inwise setting”.
And “Edit” to “Default”.
The field “Opt-in/Out to Salesforce Email Last Run” in both interference, should be updated one year ago.
Sync unsubscribes:
At “Settings” select “opt-in/out configuration” (In step 2 of this guide, you will find more information).
Click on the button – ‘one time sync email / mobile unsubscribe from inwise’.
All unsubscribes from the date displayed to the current date will now be updated according to the fields defined on this screen.
