
Knowledge Base > Campaign > Pages and forms > Adding Tags
TAG is a shortcut for a command that you can implement in various places around the mailing –as you choose. The tag is some kind of a shortcut that allows the contact to perform different actions with the touch of a button, or to implement various kinds of text throughout the mailing.
An example is a tag named Print that creates a small printer icon. Clicking on it switches the contact to viewing a preview of the mailing before printing it.
Adding tag to text
While editing a campaign, in the campaign design screen, click the location where you want to add a tag. In the edit bar that appears in the “Custom tag” menu, select the appropriate field (1).
The display of tags during editing will appear as the tag name in square brackets (3).
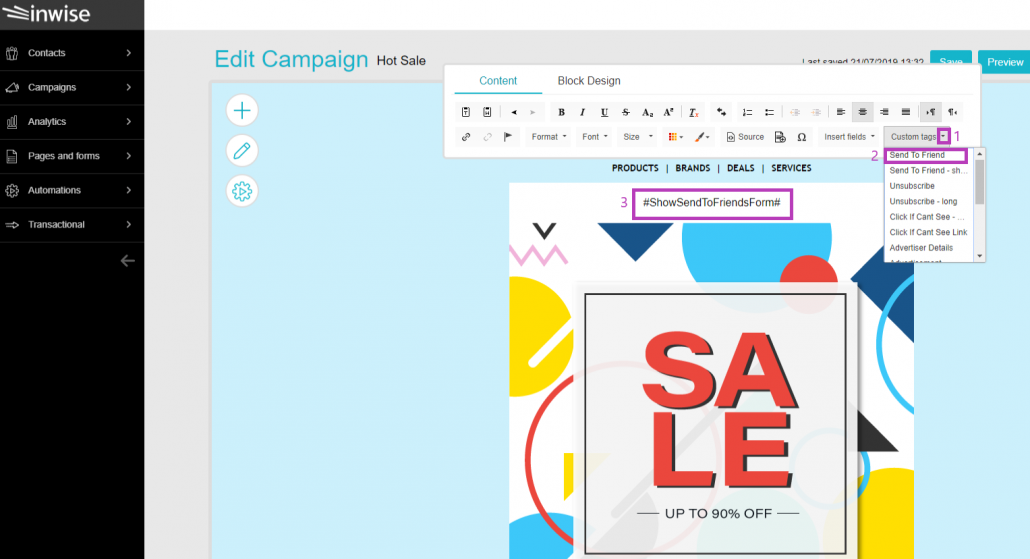
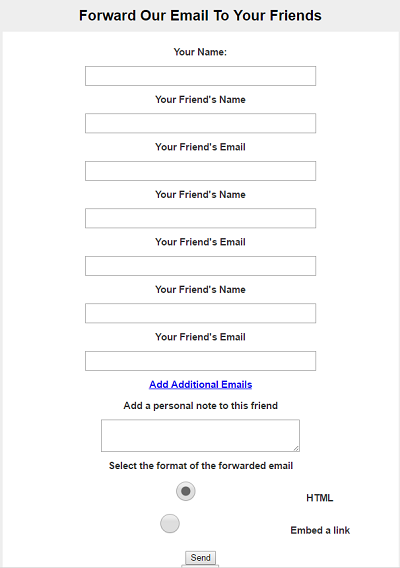
When the recipient click on “#Send To Friend#” the link will take to this form, which he can fill in his name, the name of his friend and the friend’s email address.
This is different from clicking on the standard “Forward” email, since this tag enables statistical analysis in the system.
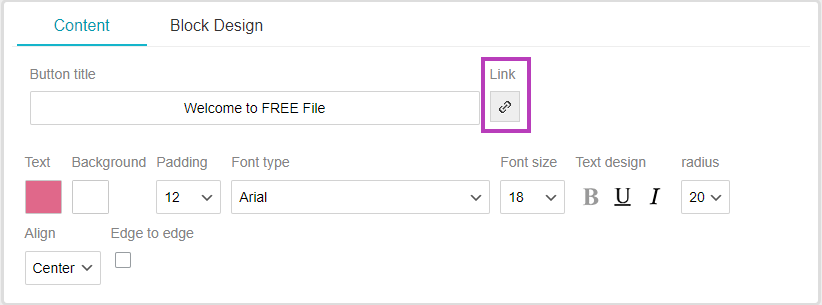
Adding tags to a button
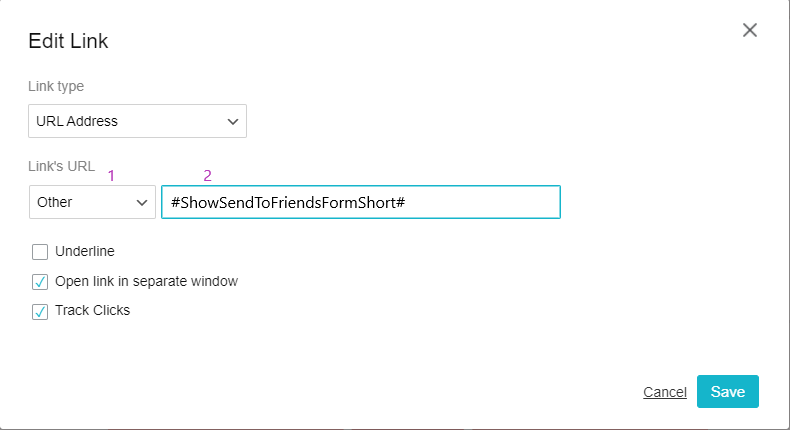
Click on the button which you wish to create the link. On the formatting menu that will open click on the link icon.
Choose “Other” in the protocol field type, and write the relevant tag in the URL field: #ShowSendToFriendsFormShort#
Short tag:
Unsubscribe: #Unsubscribe#
If you can’t see link: #clickIfCantSeeLink#
Print: #PrintShort#
Update recipient profile: #RecipientUpdateStartProcessShort#
Accessibility: #AccessibleVersion#
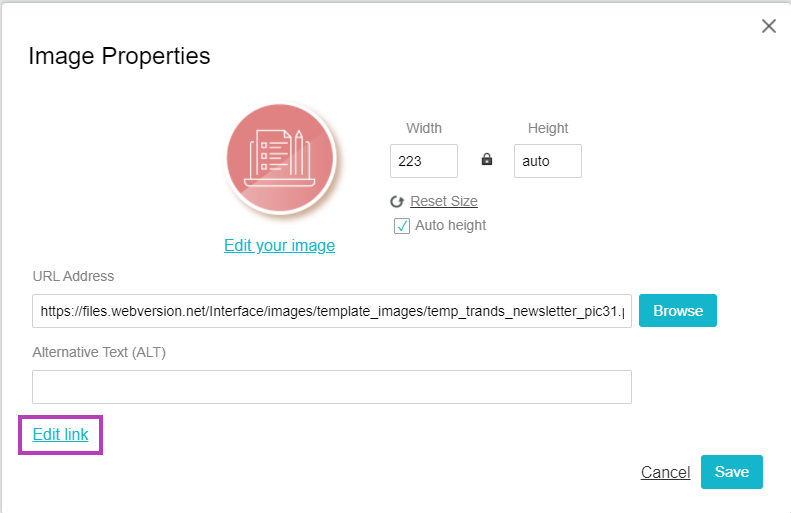
Adding tags to an image
Click on the image, in the “Image Properties” pane, click on “Edit link”.
Choose “Other” in the protocol field type, and write the relevant tag in the URL field: #ShowSendToFriendsFormShort#.
There are other tags. Here is a list of the various tags and how to use them:
Send To Friend – This tag enables sending to a friend by forwarding. Clicking this link will take the contact to form, which he could fill in his name, the name of his friend and his email address. That is different from clicking on the standard Forward email, since this tag enables statistical analysis in the area of Analytics in the system, and included in the statistics system.
Send To Friend – short – This tag enables sending to a friend by forwarding and creates a link that can be implemented across your mailings (like in the image or text to choose from) this tag enables a statistical analysis in the area of Analytics and is included in the statistics system.
Unsubscribe- The unsubscribe tag from the mailing list. You can insert this tag as a link to an image or text throughout the mailing list. Note: Unsubscribe from the mailing list appears in the mail by default — even if you have not inserted this tag. If you chose to locate the tag somewhere in the mailing, the tag will override the default and will appear the place you have chosen.
Unsubscribe long – The unsubscribe tag from the mailing list, which makes default text, is defined in the system: “for unsubscribing from our mailing list click here”
Click If you can’t see – Long – This tag produces the text “If you can’t see this email click here “. Clicking this link will take the contact to an internet displaying and responsiveness mailing
Click if you can’t see Link – This tag takes the contact to an internet and responsiveness display of the mailing. And creates a link that can be implemented nationwide mailings (like in the image or text of your choice).
Advertiser Details – This tag in the mailing list includes advertising information, which means your details. You can include text that includes your information in 225 definitions,and activate in 227 definitions.
Advertisement- This tag adds the word “Advertisement” in the body of the mail, as opposed to mailing, you can include that word automatically on the theme of the campaign, with 226 definitions.
Print – This tag enables printing the mailing and creates an icon of a small printer, click on that tag will take the contact to print preview.
Print Short– This tag creates a link that takes the contact to print preview, you can implement the link that the tag creates as text or picture.
Open The Mail – This tag creates a minimal and transparent image on the mailing. When the mailing opens, the image is like recognizes the campaign opening set – thus the statistics of emails opening sent. This tag automatically being implemented into every campaign that goes out.
# #RECIPIENTUPDATESTARTPROCESS – This tag is available in the older version of the content editor, and it enables you to add an update details form to the mailing, however, you can copy the tag as it appears here, and paste it into a mail where you choose.