Knowledge Base > Integration > Integration with WordPress – Contact Form 7 – Download Plugin
You can create various forms on your site, and each form will send the collected information to a specific contact list in your inwise account. This means that whenever a contact fills out a form on your website, their details will automatically be updated in your inwise account.
The setup is simple and one-time only, after which the synchronization happens automatically.
Steps to connect the inwise plugin to WordPress – Contact Form 7
- Download the inwise plugin for Contact Form 7 and install it on your WordPress site.
- Generate an API Key from your inwise account.
- Create a contact list in inwise.
- Install the plugin.
- Configure the plugin.
- Edit the Contact Form 7 form.
- Map the form fields you created with the fields in your inwise account.
1. Download the inwise plugin for Contact Form 7
Download the plugin to your computer from the following link:
https://www.inwise.co.il/wp-content/uploads/2024/08/inwiseintegration-1.zip-1.zip
Then, install it on your WordPress site.
*Ensure that the Contact Form 7 plugin is already installed on your WordPress site.
2. Generate an API Key
The integration between Contact Form 7 and inwise is enabled via an API Key from your inwise account.
Log in to your inwise account. In the black menu bar on the right side of the screen, under the “Integrations & Developers” category, click on “API Key.” (If you don’t see this option, please contact our support team.)
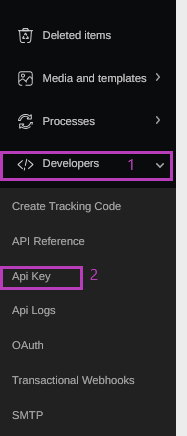
Click the “API Key” button to create a new key.
In the “Description” field, update the purpose of this key, so you can remember its usage and distinguish it from others.
Save the API Key for future use.

3. Create a Contact List in inwise
In the black menu bar on the right side of the screen, click “New” and select “Group.”
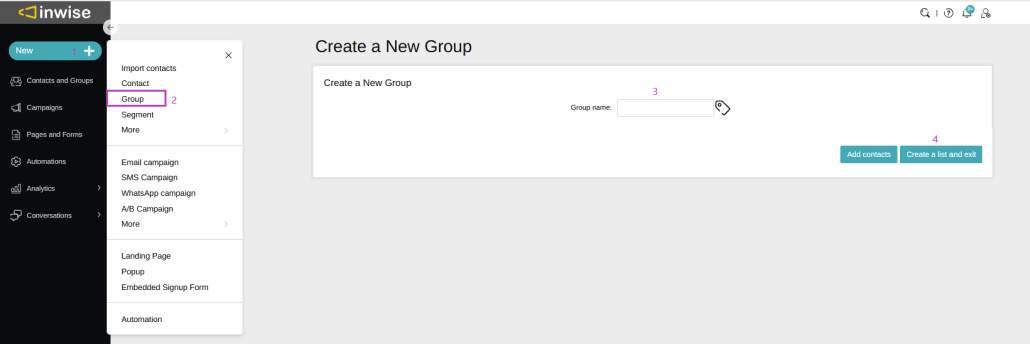
Update the group name, and once done, click “Save and Exit.”
You will see the group added to your contact list. Copy the group ID and save it for the next steps.

4. Install the Plugin
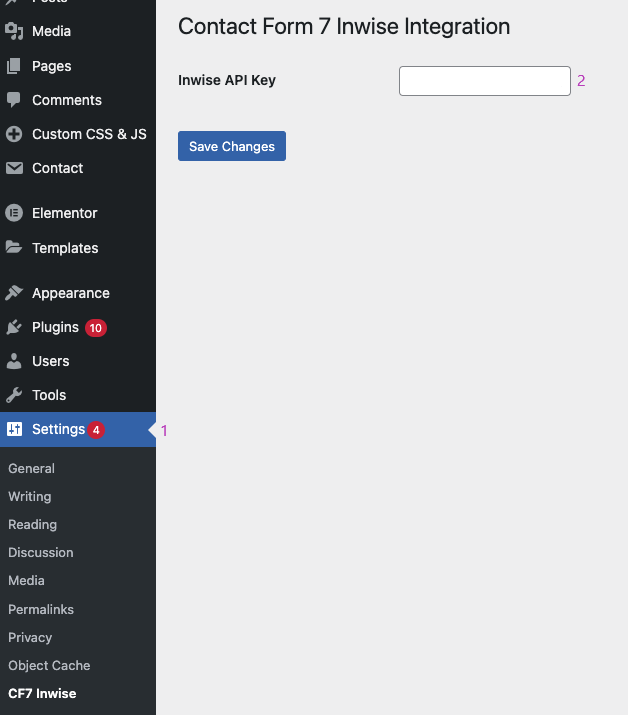
In the “Settings” menu of your WordPress admin interface, select “inwise CF7.”
Enter the API Key you generated in step 2 and save.
5. Configure the Plugin
Under the “inwise Integration” tab, enter the contact group ID you saved in step 3.

6. Edit the Contact Form 7 Form
Create a new form using Contact Form 7.
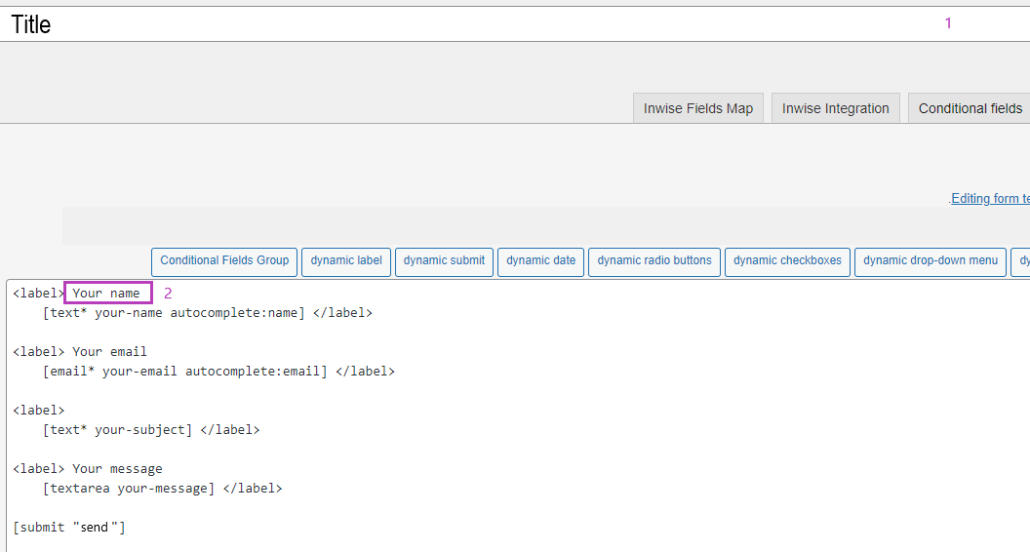
You will see an HTML screen with the default basic form and information fields representing your form. Edit it as needed.
Title: Enter a name for your form to differentiate it from other forms.
Field Names: To change the field names, such as first name, phone number, email, etc., update the text next to the <label> code.
7. Map Form Fields
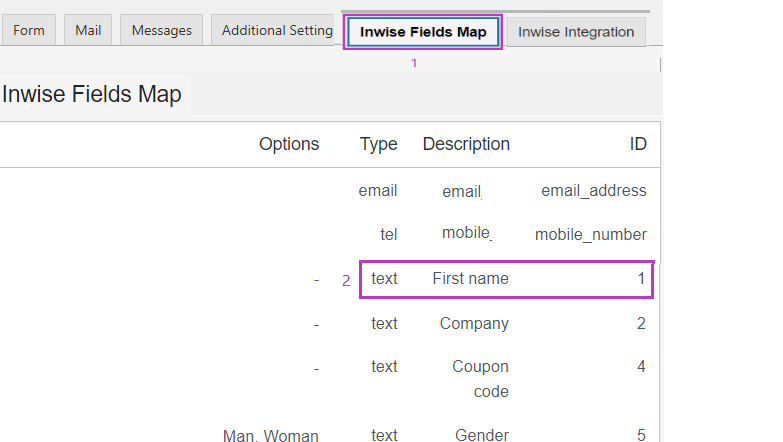
To link the fields in the form you created with the fields in your inwise account, go to the “inwise Fields Map” tab.
In this window, you will see all the fields in your inwise account (description and field type) along with their ID numbers.
To map the fields from your form to those in inwise, update the relevant field IDs.
For example, the ID for the “First Name” field in inwise is 1, so next to the class code, you should prefix with “inwisefield” and add the field number like this: “class:inwisefield1”.
For the email field, use “email_address”.
For the phone number field, use “mobile_number”.
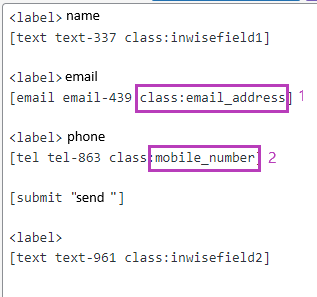
You can also add any other relevant fields that exist in your inwise account, such as full name, address, date of birth, etc.
After creating the form, ensure that at least one of inwise’s key fields (email or phone) is present.

Finally, copy the shortcode for the form from your WordPress form list and embed it on your website.
Test the form to ensure the details filled in are properly updated in the relevant inwise contact group.
